-Sponsored Post-
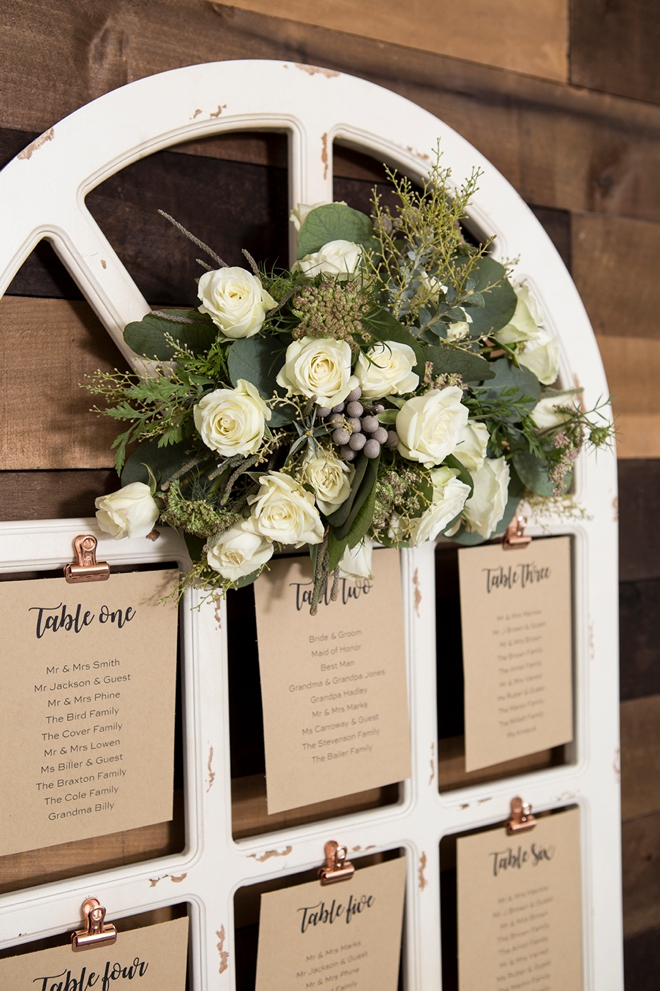
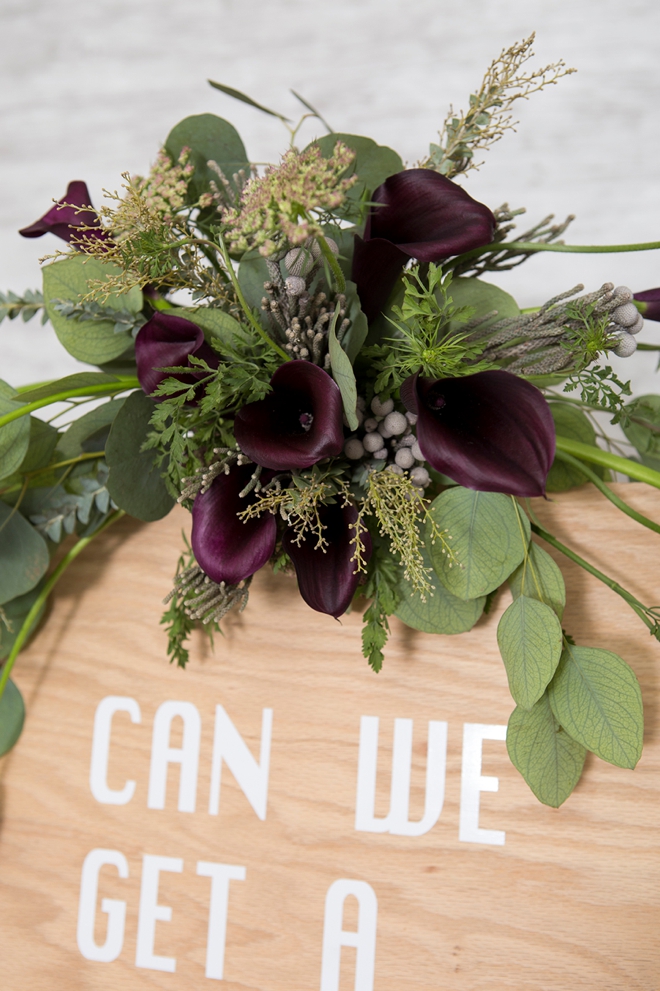
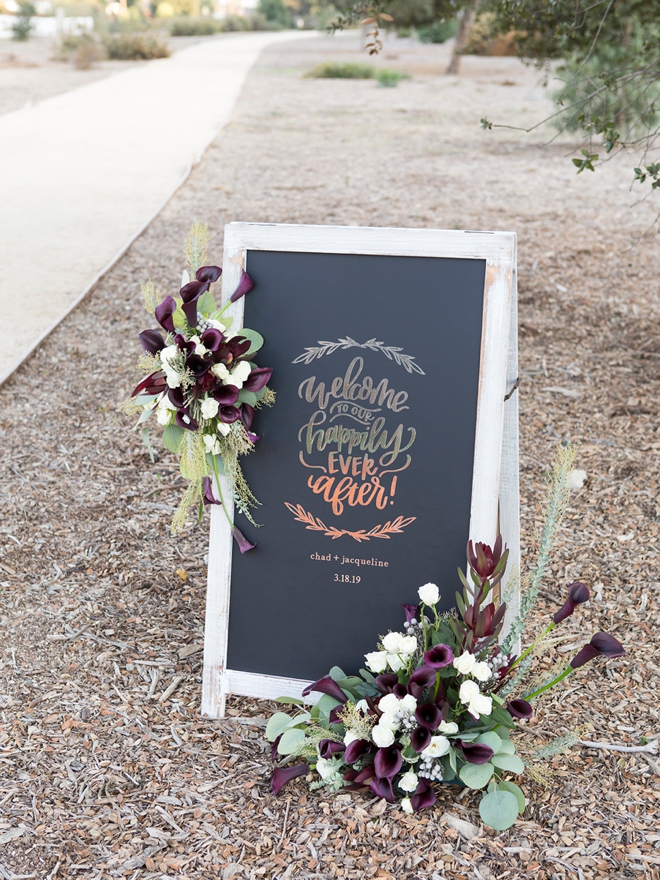
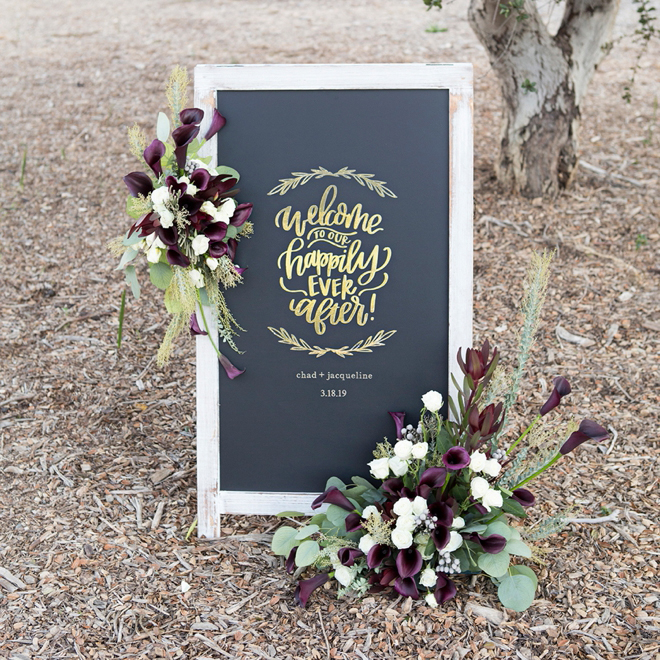
For our sixth DIY Flower feature with FiftyFlowers (you might remember our first one the Floral Hoop Decor), we’re making gorgeous flower arrangements to adorn your wedding signs with! Here I’m using a FiftyFlowers DIY Flower Combo Pack, which is a thoughtfully curated collection of flowers and foliage, perfect for the DIY bride and projects like this. It’s a brand new collection called Oxblood and Sage DIY Combo Flower Pack that is absolutely stunning and perfect for the fall. Embellishing wedding signs with flowers has become quite the trend over the past few years so we (when I say we, I mean me and my florist Jacki) decided to show you how to create them yourself, the right way.
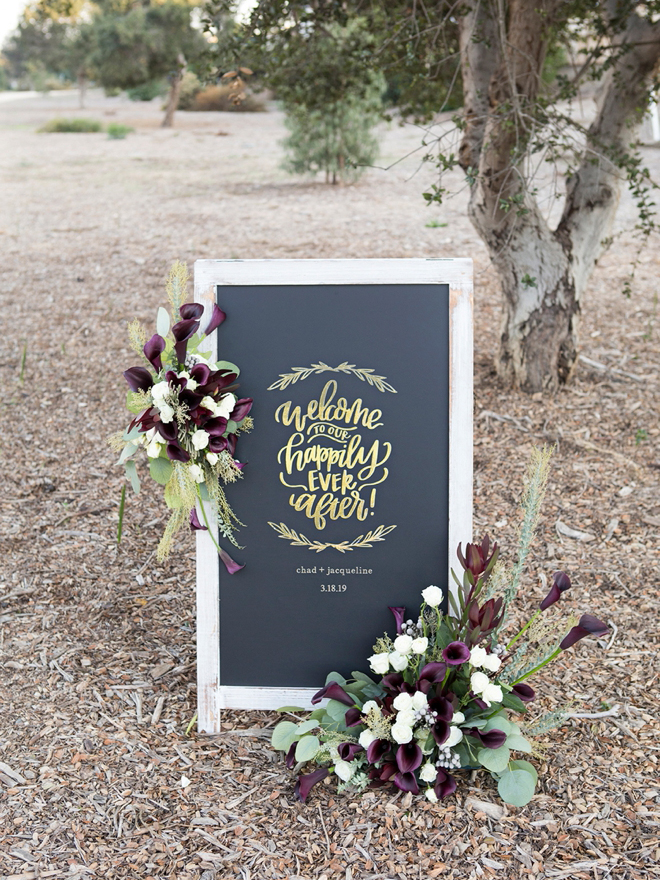
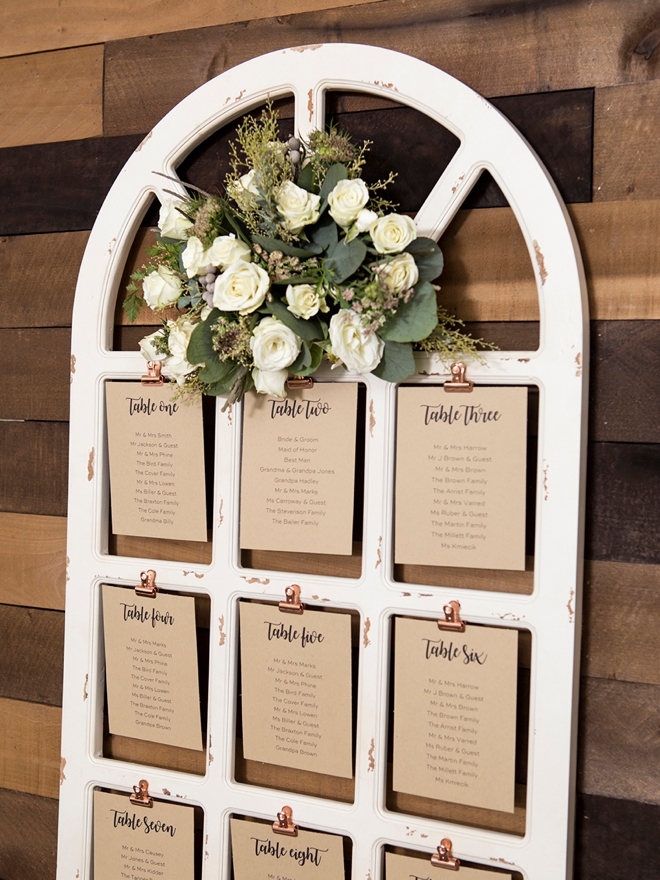
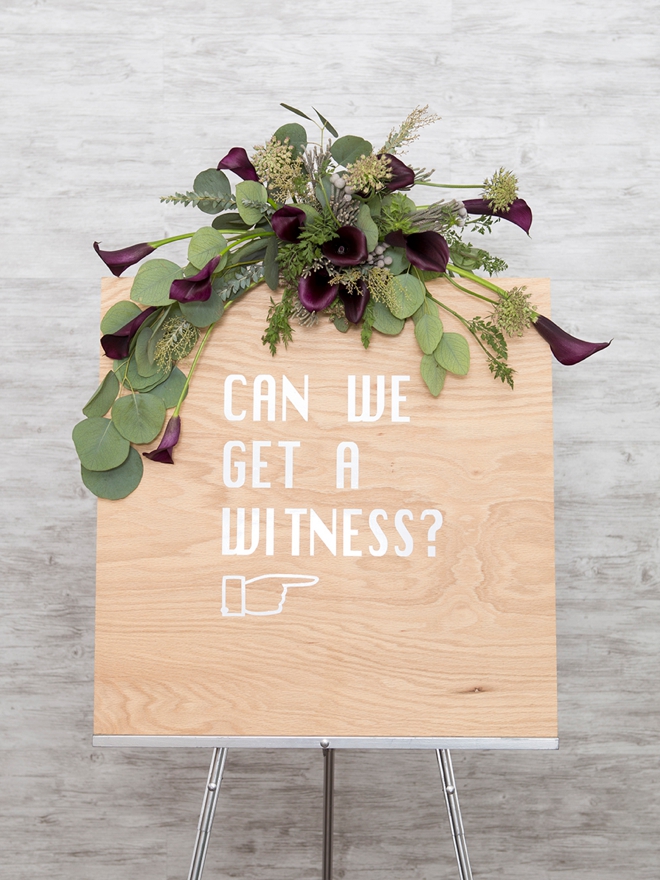
DIY Wedding Signs
We have two terrific posts about making your own wedding signs and I highly recommend checking them out. From making prints with your home printer to cutting graphics using your Cricut, it’s all there!
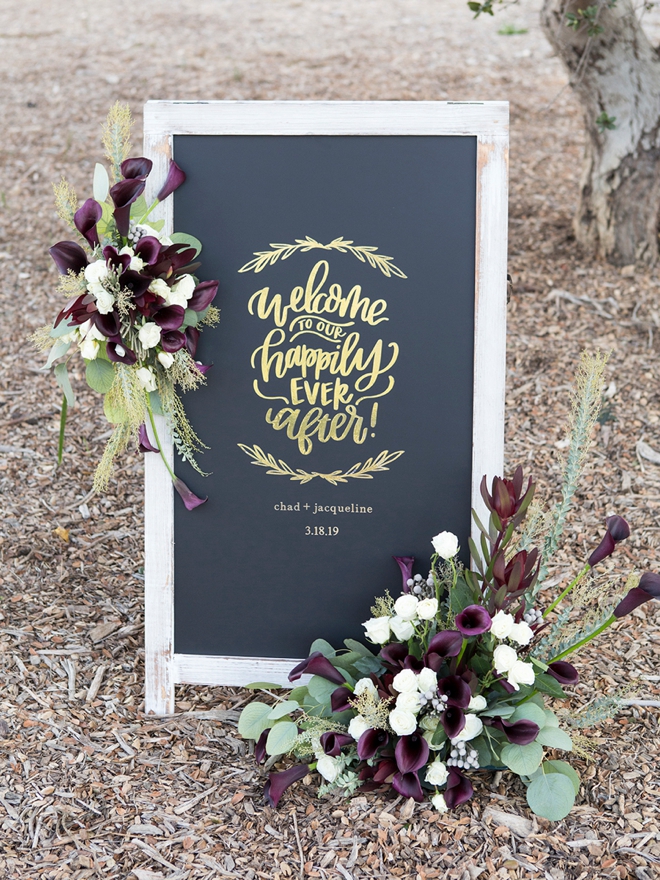
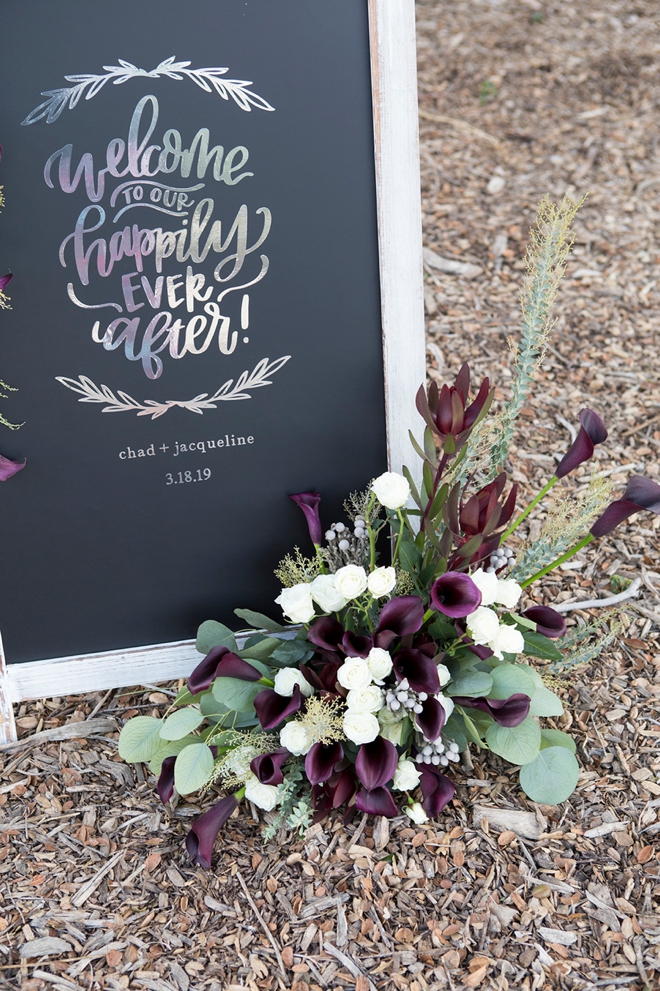
The “Welcome To Our Happily Ever After” hand-lettered design from the sign pictured here is one of our exclusive .SVG cut files for sale in our shop!
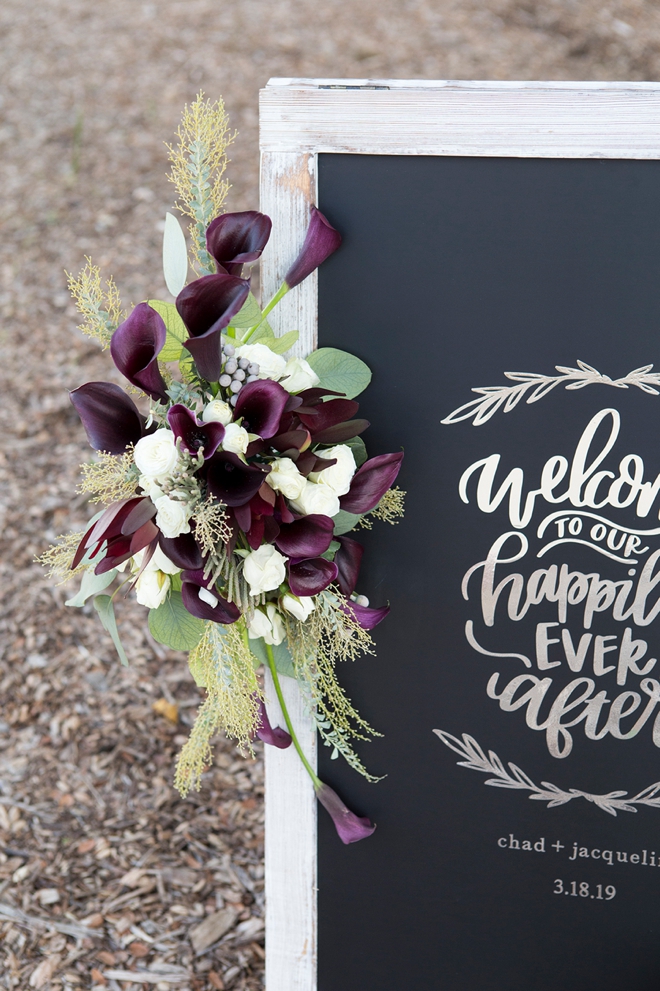
SUPPLIES:
- Oxblood and Sage DIY Combo Flower Pack from FiftyFlowers.com
- 1/4″ Waterproof Floral Tape
- Oasis Foam Holders
- Clear 12″ Zip Ties
- Floral Shears and/or Knife
- Hardware Store Buckets
DIY Flower Combo Packs
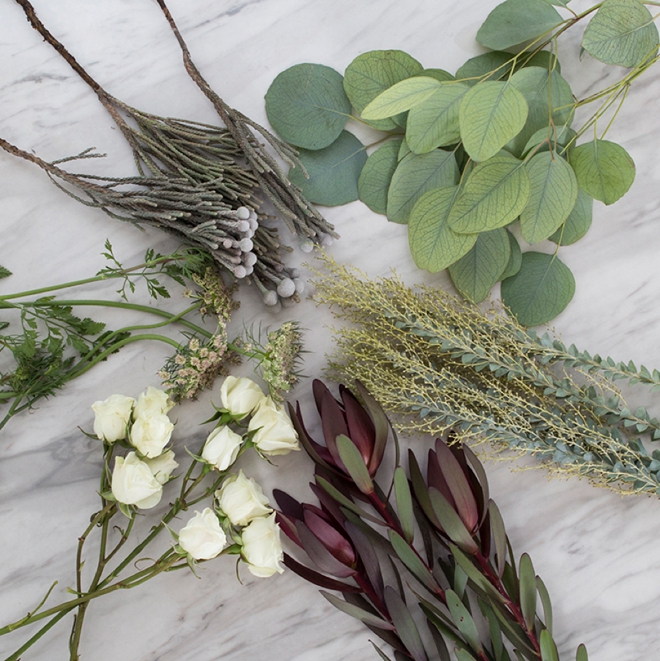
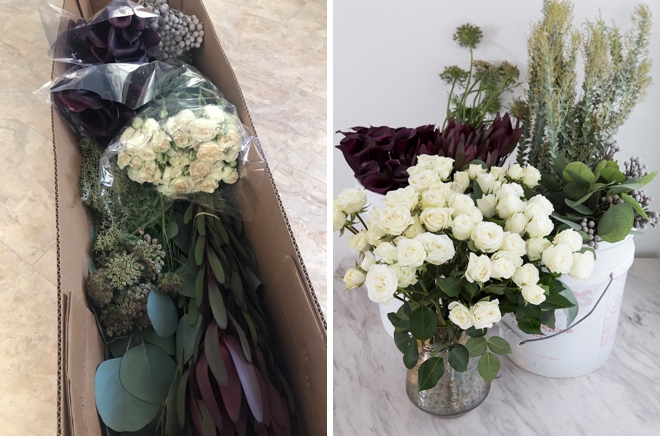
FiftyFlowers sells these awesome DIY flower combo packs that have been curated by color or style. They have everything you need to create well-styled floral designs. The pack I’m featuring today is the small, Oxblood and Sage DIY Combo Flower Pack with the optional Petite Burgundy Black Mini Calla Lilies, it contains:
- White Spray Roses
- Silver Brunia Balls
- Football Mums
- Silver Dollar Eucalyptus
- Knife Blade Acacia
- Safari Sunset
Rehydrating
FiftyFlowers is a farm to customer, wholesale flower company. Which means that your flowers are shipped straight to you from the farm! They will arrive in large cardboard boxes.
- Using hardware store buckets, fill them up 1/4 of the way with water, make sure they are clean to start with.
- Carefully unbox and unpackage your flowers, per the instructions from FiftyFlowers. Each flower is different and their team can walk you through the prep for each flower if needed.
- It is 100% normal for your flowers to look a bit tired and lifeless, they’ve been on a long journey to you.
- Give each stem a fresh diagonal cut and place in the water to rehydrate for 4-12 hours.
- Keep out of the heat and sun while rehydrating.
Cleaning
This pack of flowers was incredibly easy to process, clean and prep for this project. Simply cut the stems down to 6″-10″ to make them easy to work with.
Oasis
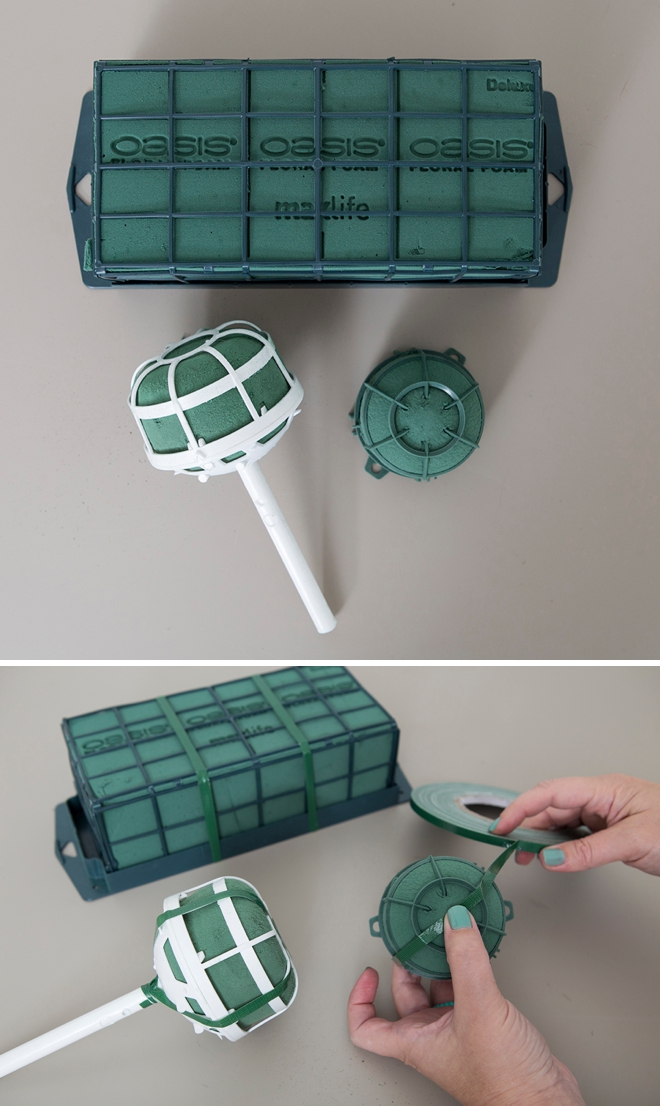
Oasis is a a special type of rigid foam that flower stems can be secured in during flower arranging. It also provides a water source for the flowers to draw from, keeping them fresh. Water can be added to the foam for days after the arrangement is complete, just like a vase. It comes in many different shapes and sizes to fit your unique projects. The kind we’re using today have plastic cages:
To start we’re going to reinforce the cage using 1/4″ waterproof Oasis floral tape by wrapping the plastic parts. This ensures that the cages won’t accidentally pop open during transport.
Soak The Oasis
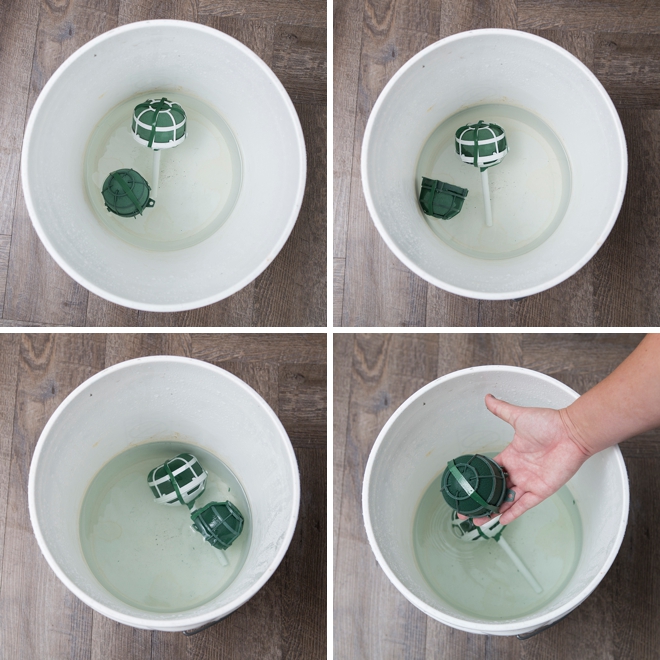
Fill up a bucket or your sink with water and place the oasis on top. Don’t press it under the water, it will quickly absorb it naturally. Letting it fully absorb the water only takes a few minutes. A few Oasis tips:
- You can’t re-soak Oasis after it’s initial first soak
- Do not push your fingers into it – If you insert and remove flowers from the foam it creates holes that can’t be fixed
- Do not pour Oasis water down the drain or it could cause a clog
- When you push flower stems into wet Oasis it causes water displacement and pushes the water out onto your table
- Add water to the Oasis arrangements every 1-2 days
Curving The Lilies
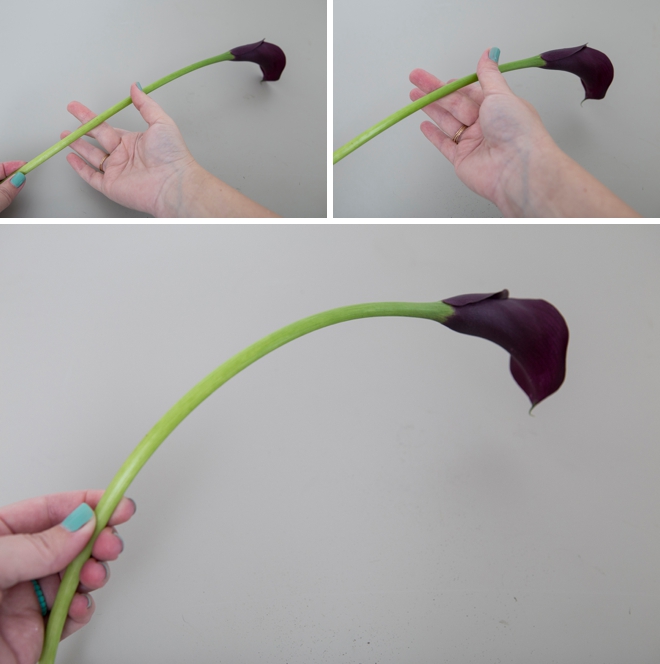
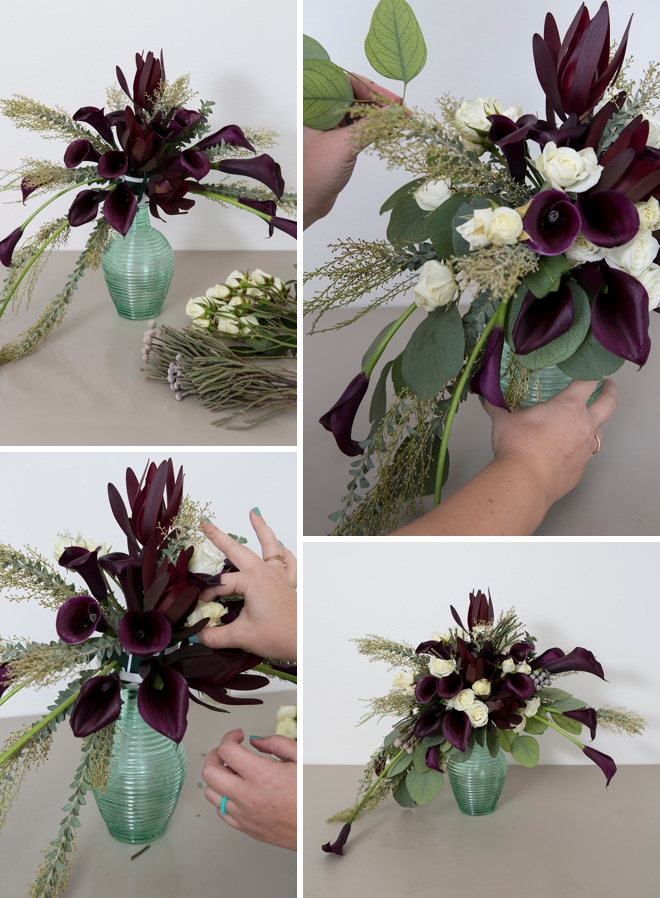
A unique aspect of lily stems is that you can put a bend in them! Gently work your fingers along the stem from bottom to top in a curvy type motion to put a bend in straight stems!
Create Your Arrangement
Get yourself set up on a table on a towel or the like. Adding flowers to wet Oasis causes water displacement, and you’ll want something to soak it up. Start your arrangement by creating your line, to create the shape use the longest flower stems and imagine them coming from one center-point in the Oasis. Then add flowers in a cluster to create the focal point. Fill in with flowers to cover the base and then add detail flowers like the Brunia balls. Keep building until you can’t see any Oasis

Use A Vase
When designing arrangements using bouquet holders you can place them in a vase to hold them while working. It also elevates the flowers to help your eye during designing.
Zip Ties Rock
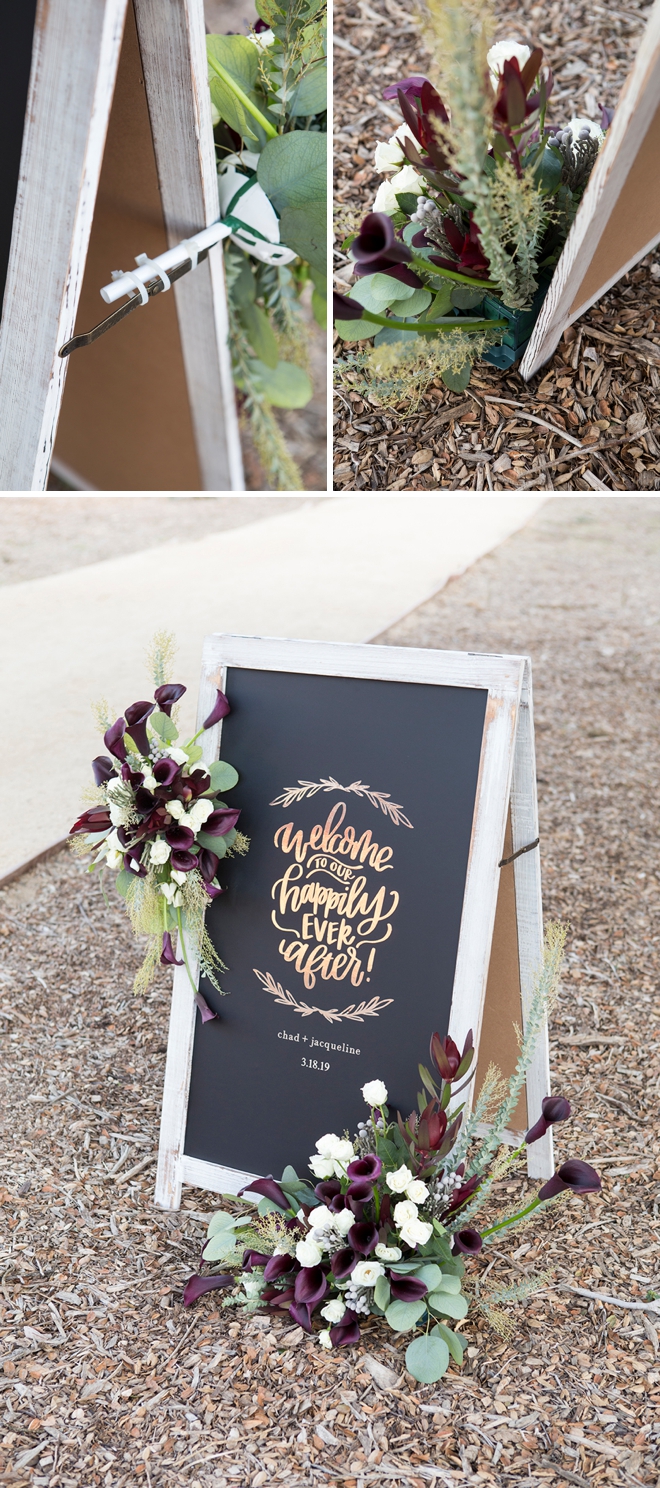
All three bouquets are attached to the signs using zip ties. For the Welcome sign we used a bouquet holder and the tribute case oasis for the base of our arrangements. The bouquet holder is zip tied to the hinge of the sign and the tribute cage was just placed on the ground in front of the sign.
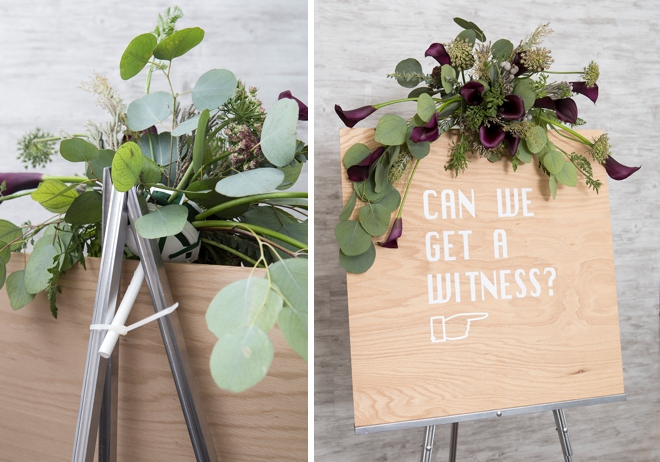
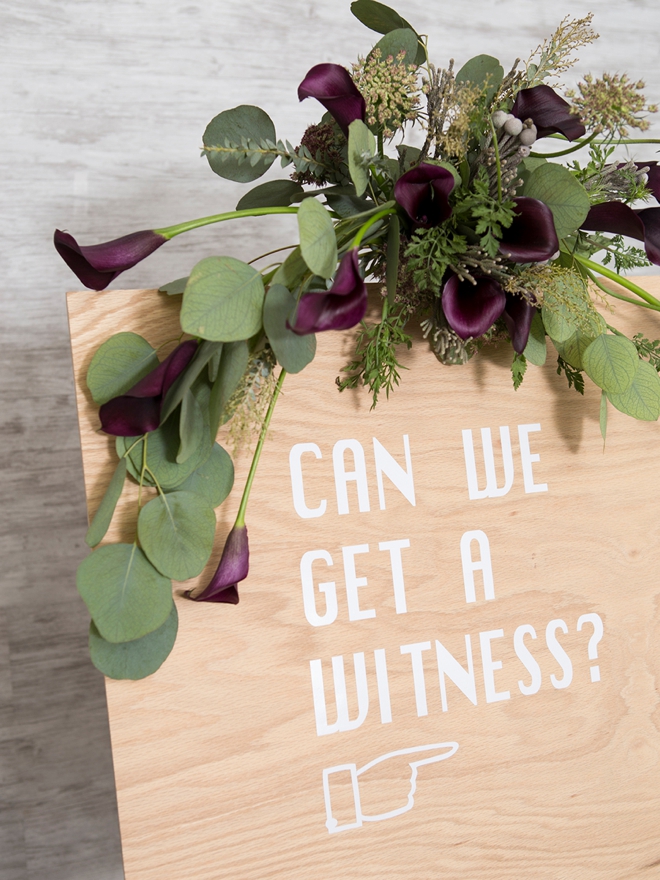
For the witness sign we used a bouquet holder for the base and we zip tied it to the backside of the easel, on top of the sign.
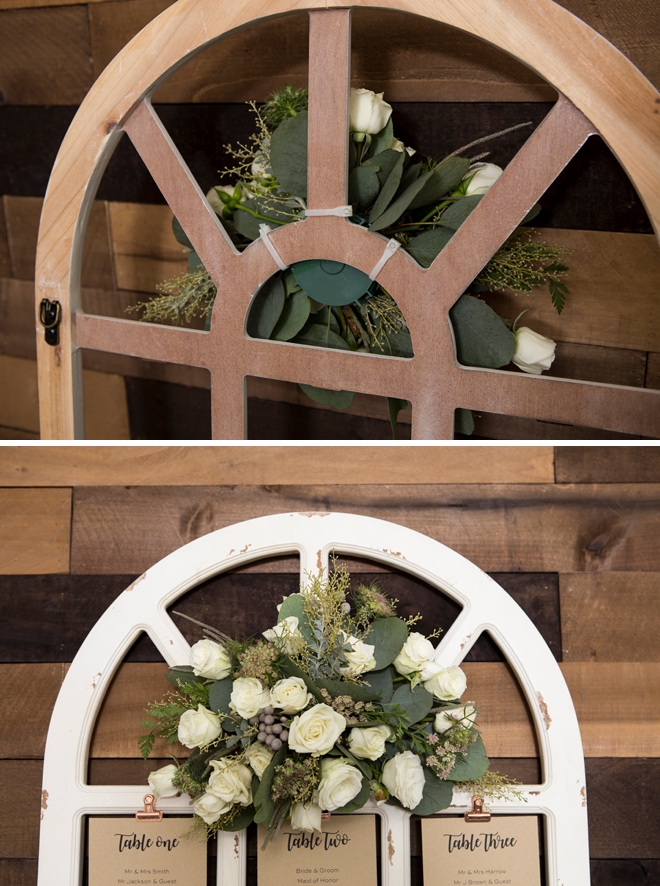
For the seating chart we used the Iglu oasis and zip tied it to the wooden slats of the frame.
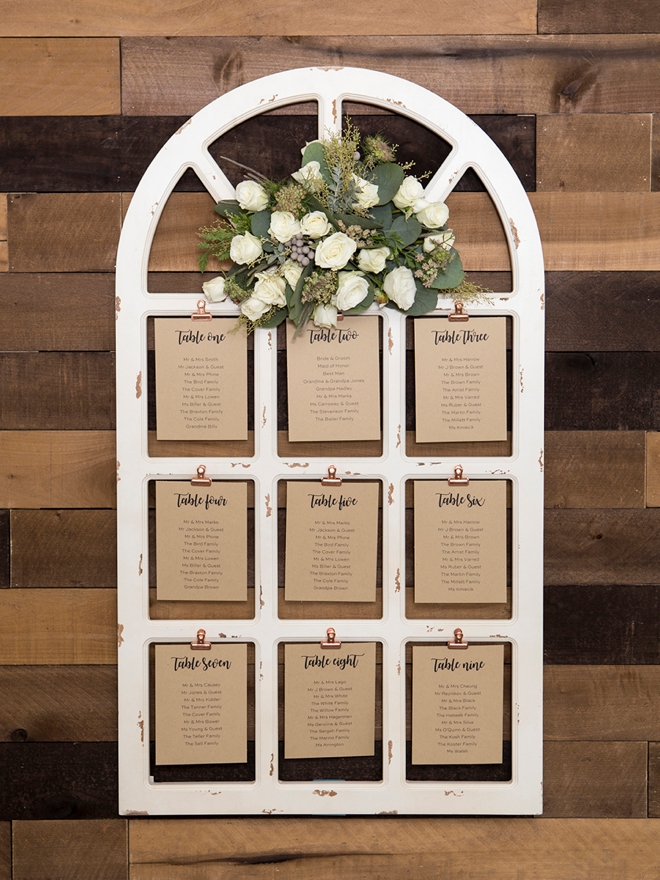
Sign On Hand
I recommend having your wedding sign handy while designing your arrangement. It really helps for sizing and the overall look to be able to add a few flowers, hold it up to the sign, add a few more, hold it up to the sign, and keep working until you’re happy.
DIY Tutorial Sponsored By:

FiftyFlowers is the customer-centric, online destination for wholesale wedding flowers, shipped fresh from the farm straight to your door! Inspired by the DIY bride, we offer an extensive selection of fresh flowers, greenery, and floral accessories because we believe anyone can create their own wedding flowers.
As with all our DIY tutorials, if you create one of our projects please send us a picture – We Love Seeing Your Creativity! If you use Instagram or Twitter please use the hashtag #SomethingTurquoiseDIY and it will show up on our Get Social page. Happy Crafting!
DIY Tutorial Credits
Photography + DIY Tutorial: Jen Causey of Something Turquoise // All Flowers and Floral Supplies: courtesy of FiftyFlowers.com // Florist: Floral Designs By Jacqueline Ahne // Clear 12″ Zip Ties: Amazon // Nail Polish: OPI – Withstands the Test of Thyme
Shop The Supplies:
Find the supplies you’ll need for this project from our affiliate links below:


Comments