-Sponsored Post-
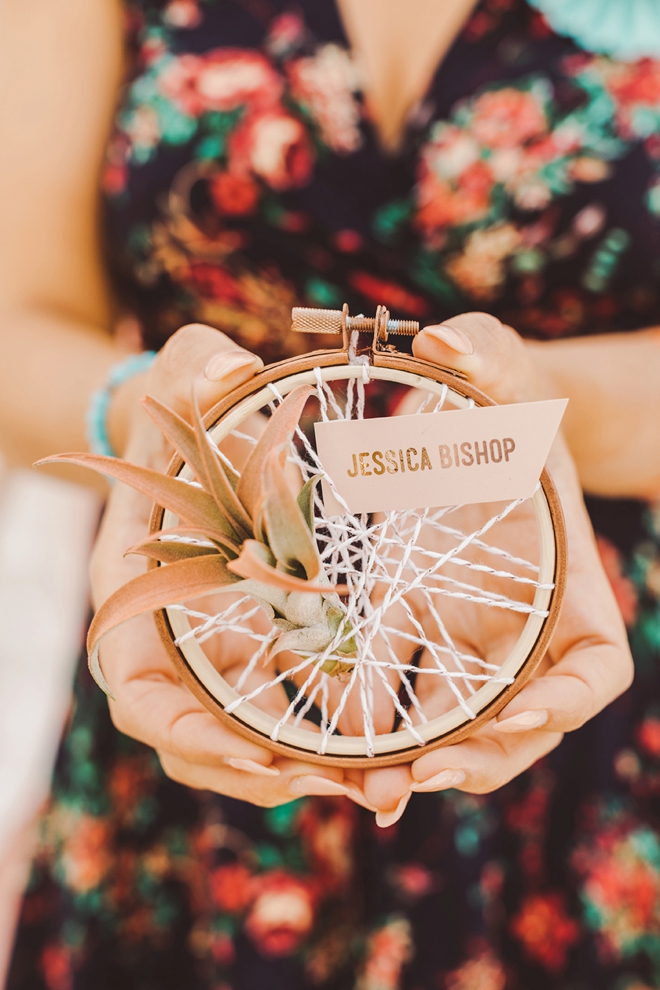
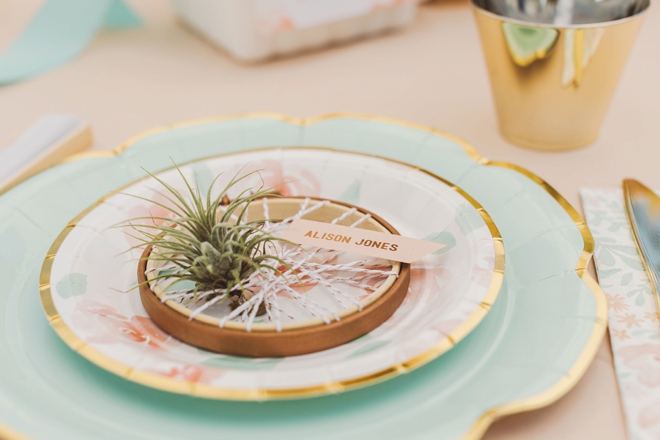
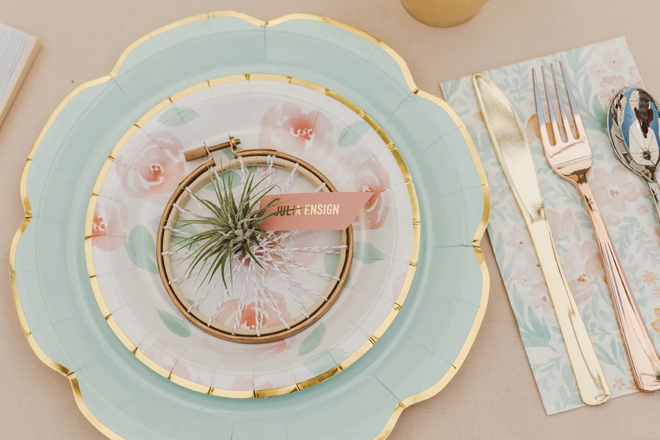
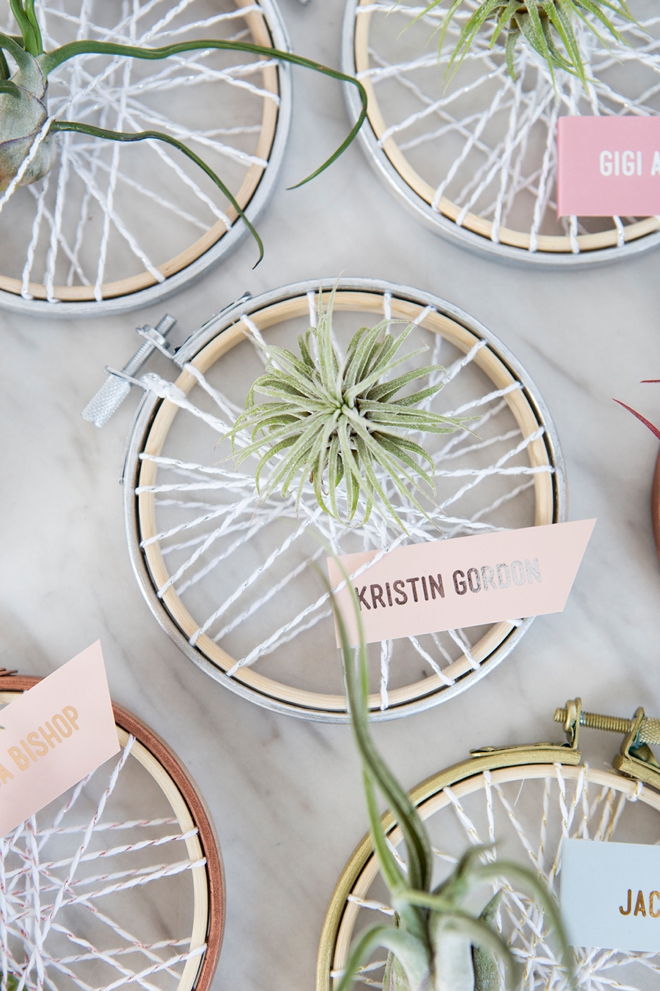
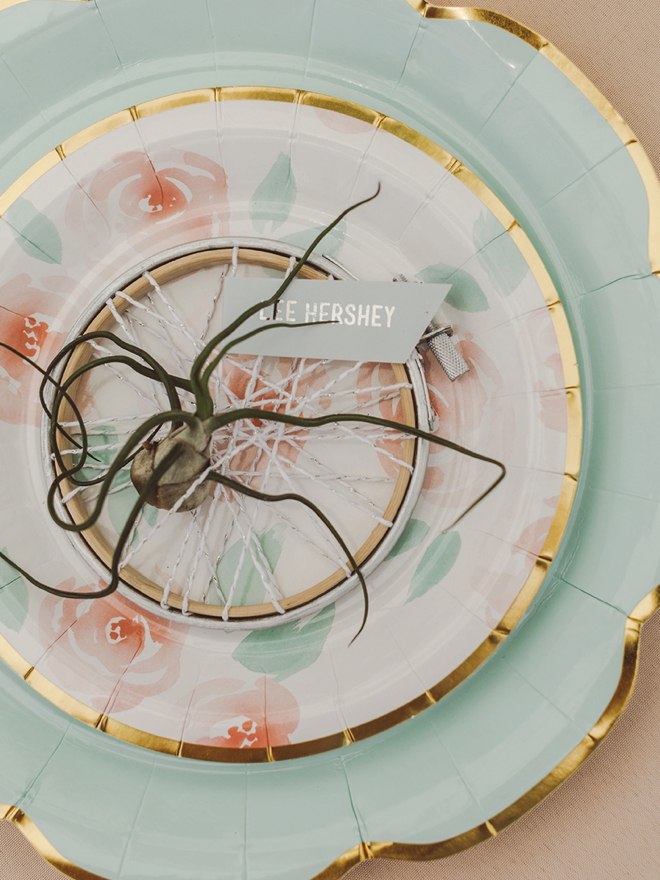
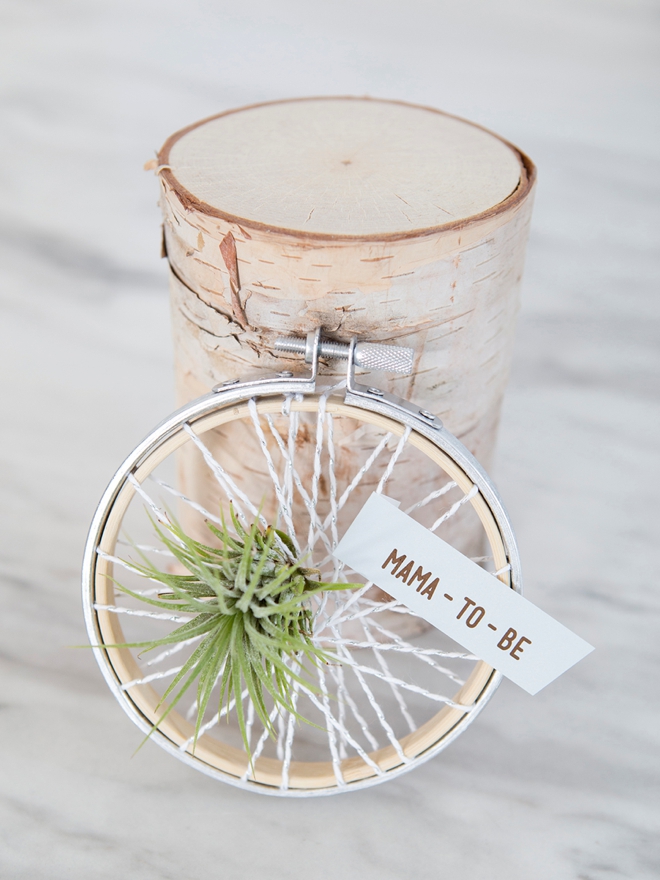
For our fourth DIY Flower feature with FiftyFlowers (you might remember our first one, second, and third projects!), today I’m sharing a super fun idea for air plant favors that double as seating cards! Here I’m using the FiftyFlowers Bulk Assorted Air Plants, which is a lovely collection of about five different types of Tillandsia (their real name) plants, perfect for decorating and DIY projects like this. Most of the time, the projects I make for the blog are simply for your inspiration and not for real events. But lucky me, I was able to use this idea for the favors and seating cards at my baby shower a few weeks ago. I’ll be sharing much more of the shower in weeks to come, but until then… happy favor making!
Making Them Ahead
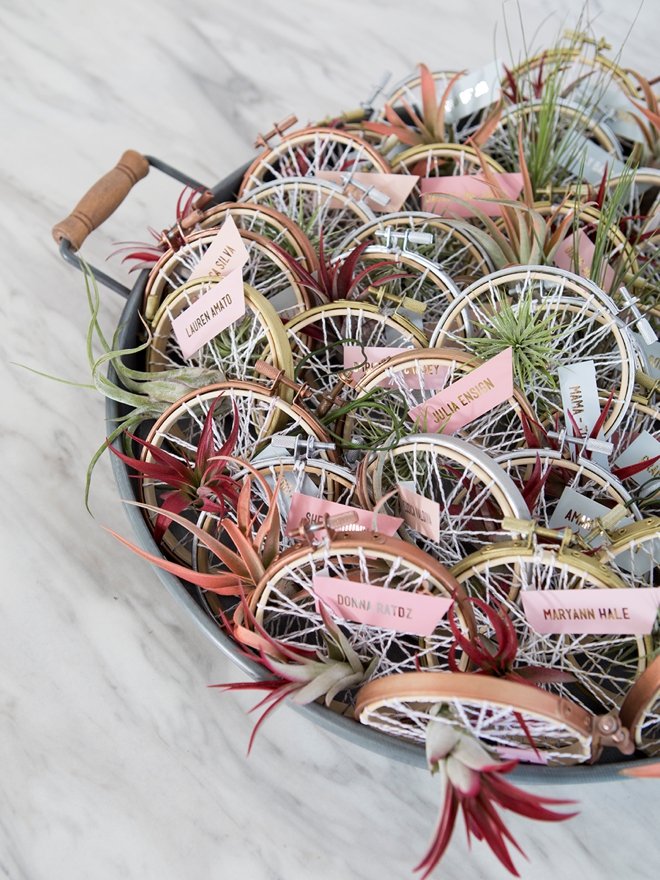
This type of favor you can easily make ahead of time, which is awesome. Keep them laid flat on a table or in an open box, not stacked on top of each other and give them a spritz of water about once a week. Make sure they also have access to fresh air. If any die before your event, at least you’ll have time to replace them. I placed them all in this large serving tray to transport them to my shower.
SUPPLIES:
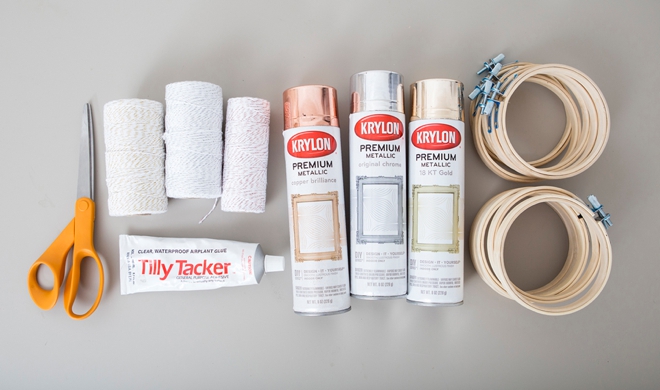
- Bulk Assorted Air Plants from FiftyFlowers.com
- 4″ Embroidery Hoops
- Tilly Tacker Glue
- Spray Paint
- Twine
- Scissors
- Cardstock
DIY Flower Combo Packs
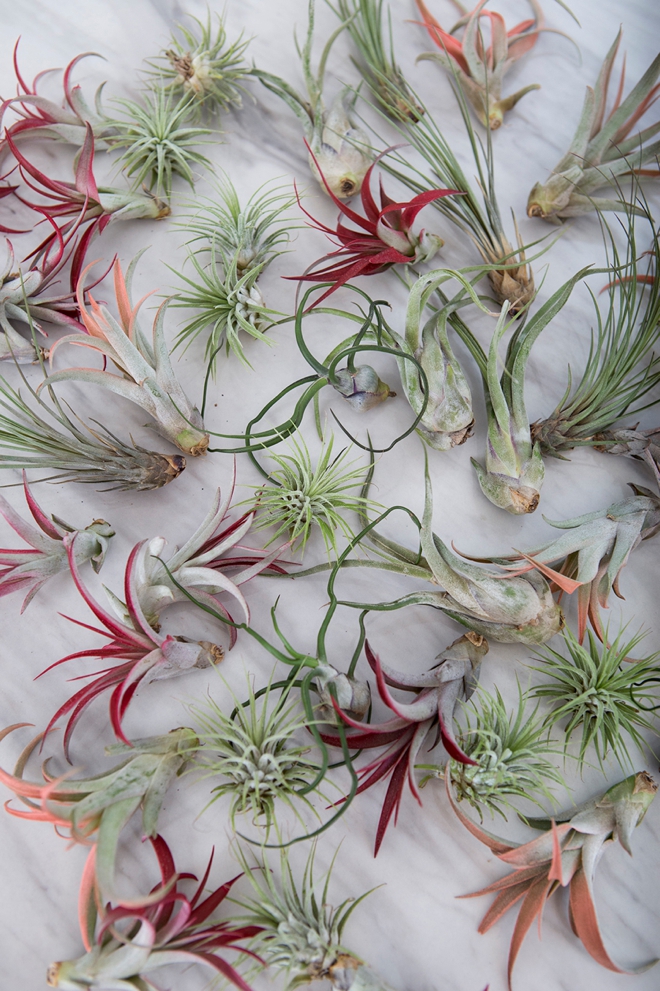
FiftyFlowers sells these awesome DIY flower combo packs that have been curated by color or style. They have everything you need to create well-styled floral designs. The pack I’m featuring today is the, Bulk Assorted Air Plants, which contains 47 individual Tillandsia air plants. They are eco-friendly, low-maintenance blooms that live outside of dirt and only require fresh air and squirt of water here and there! Aren’t they pretty!?
They arrive looking just like this, there is no rehydration or cleaning required.
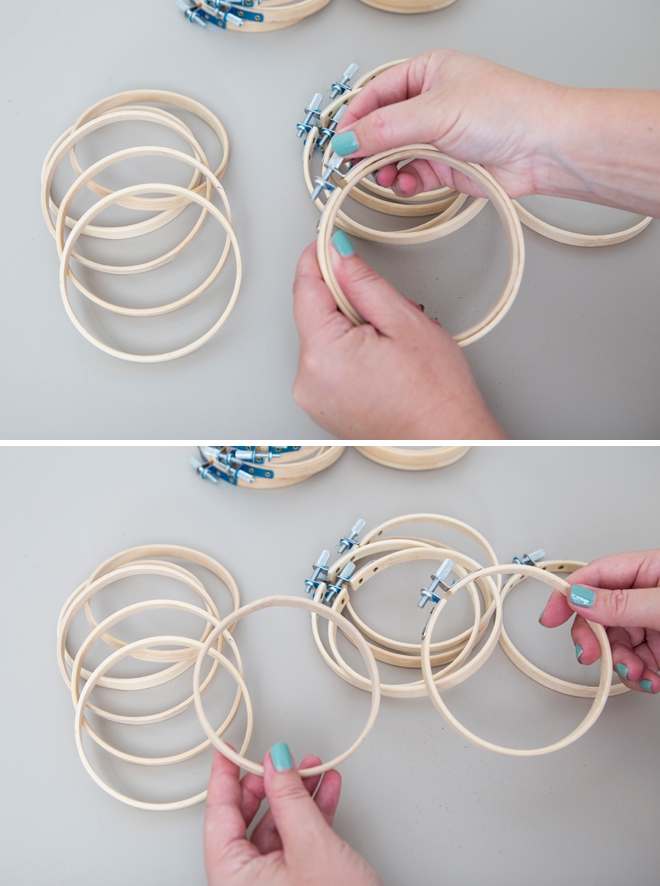
Open The Hoops
Open each embroidery hoop and separate the two wooden pieces. Also, if your hoops come with the annoying blue tape across the screw, remove that.
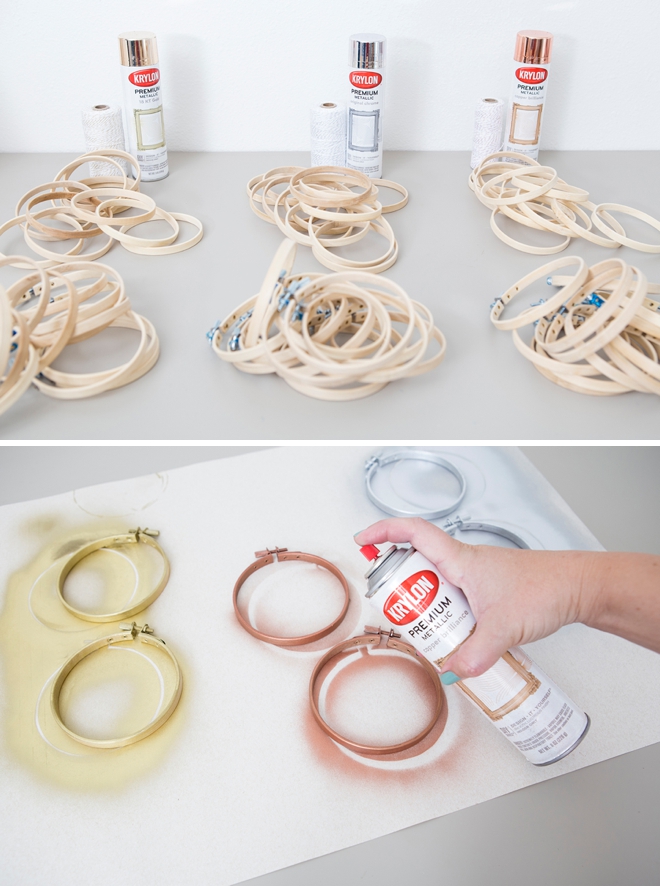
Spray Paint
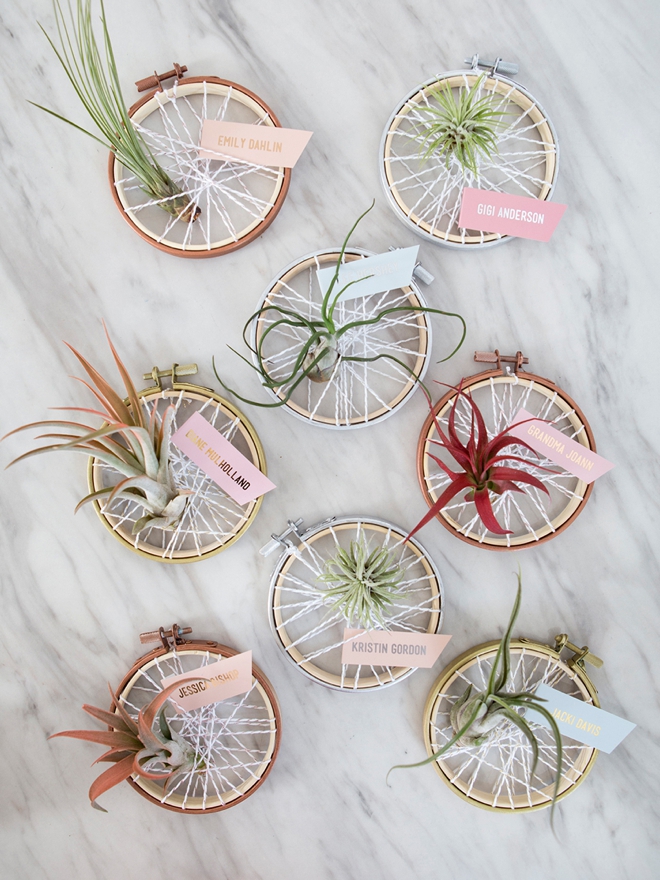
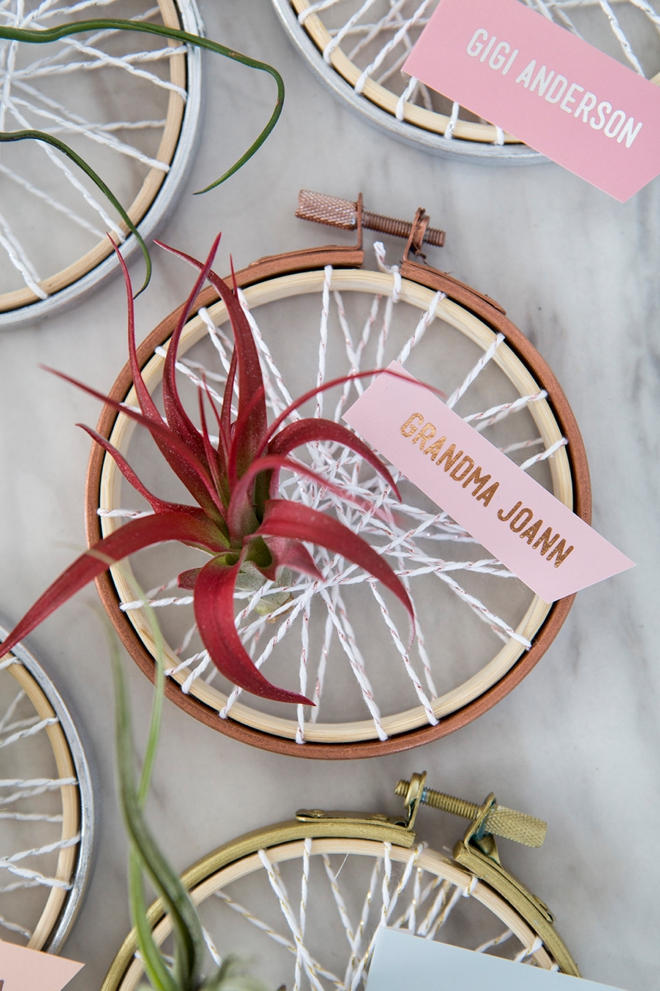
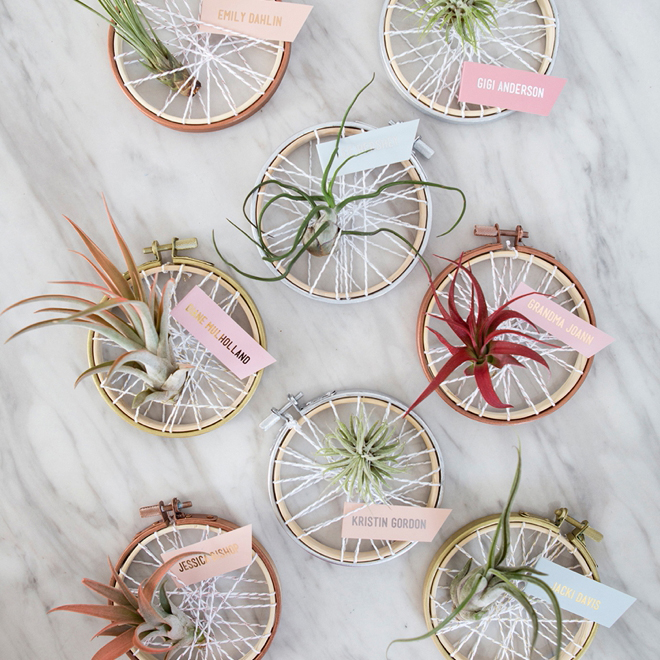
For my shower, I used mixed metals in copper, silver and gold. I divided the hoops into thirds and spray painted the outside of each hoop one of the metallic colors. One coat on the front and one on the back. The inner wooden hoop I left raw wood.
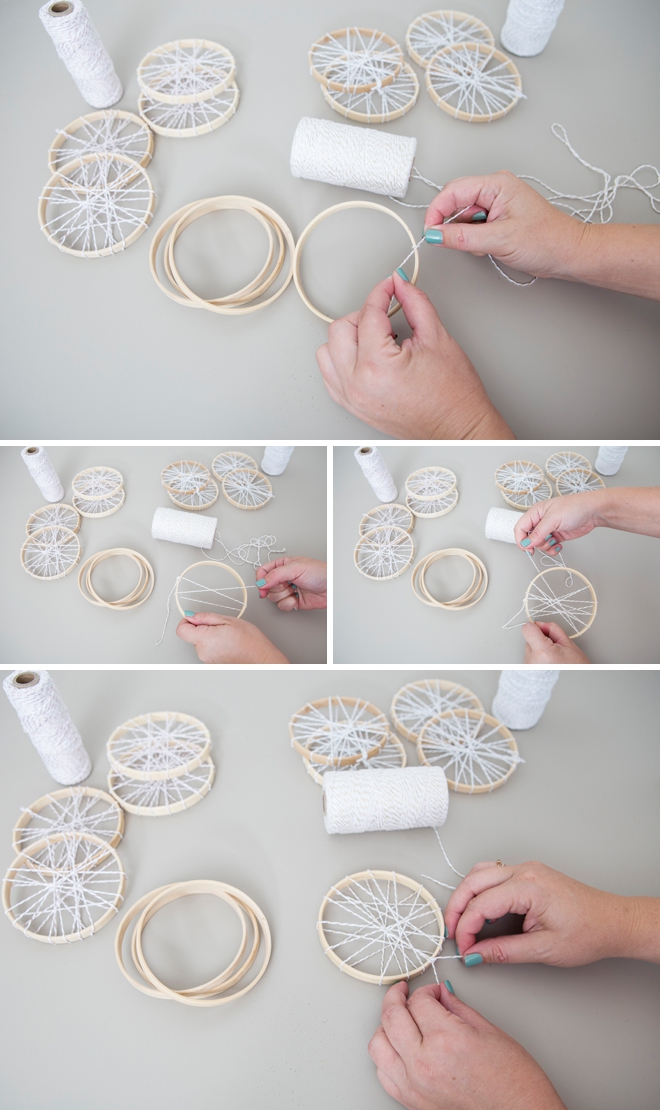
Twine Dream Catcher
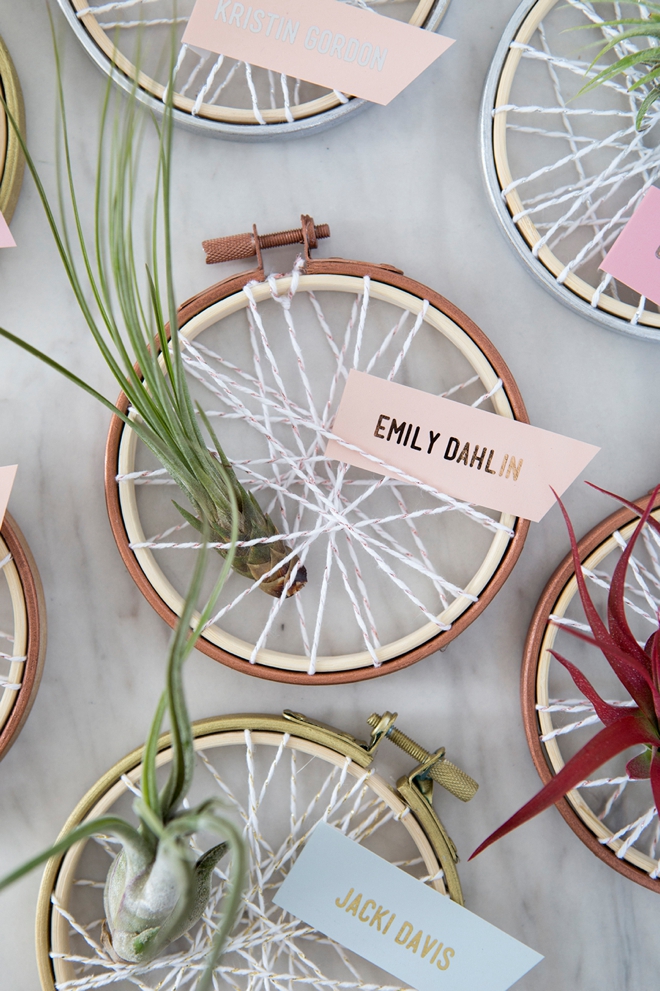
I think this part kinda looks like a dream catcher! To coordinate with the mixed metals I also used silver, copper and gold twine for this step. I tied twine to the edge of the inner wooden hoop and wrapped and wrapped and wrapped it around in a dream catcher type pattern and then tied if off to secure.
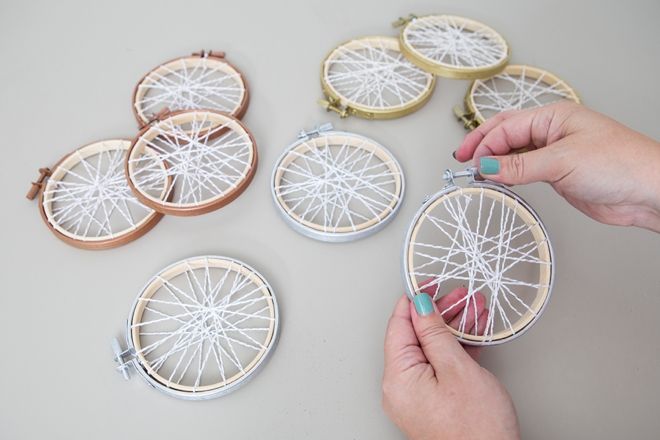
Combine Hoops
After you finish with the wrapping the outer hoops should be dry. Put them together and tighten the screw at the top. Assemble all hoops this way.
Name Tags
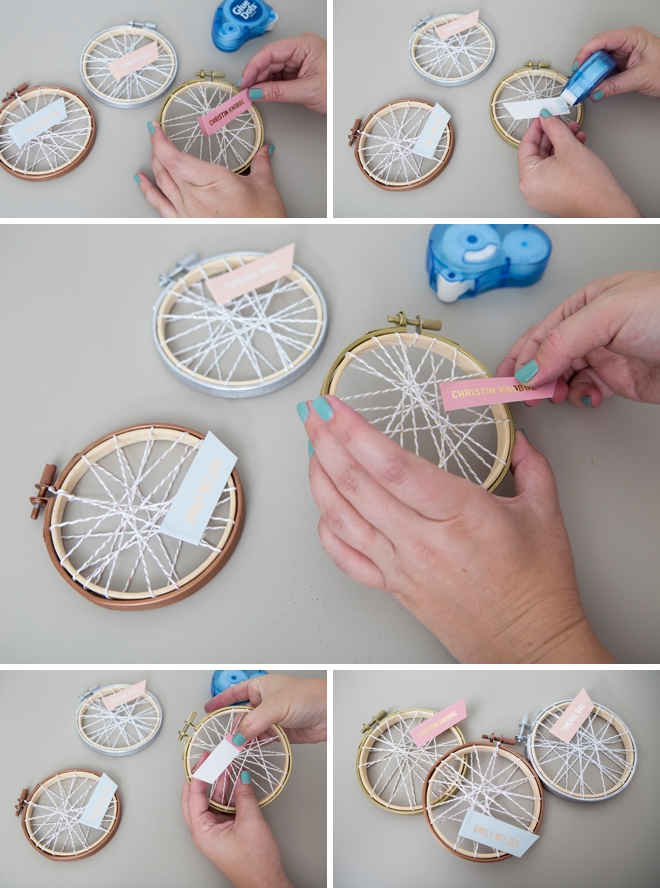
Add little name tags to each hoop! I did this by using my laser printer to print each name onto cardstock, the font I used is called Mensch. Then again using the three metallic colors I ran the tags through my Minc to add metallic foiling. If you don’t know how to do that you can visit this post. I folded the end around one piece of twine and attached the tag using a Glue Dot.
Glue On The Air Plant
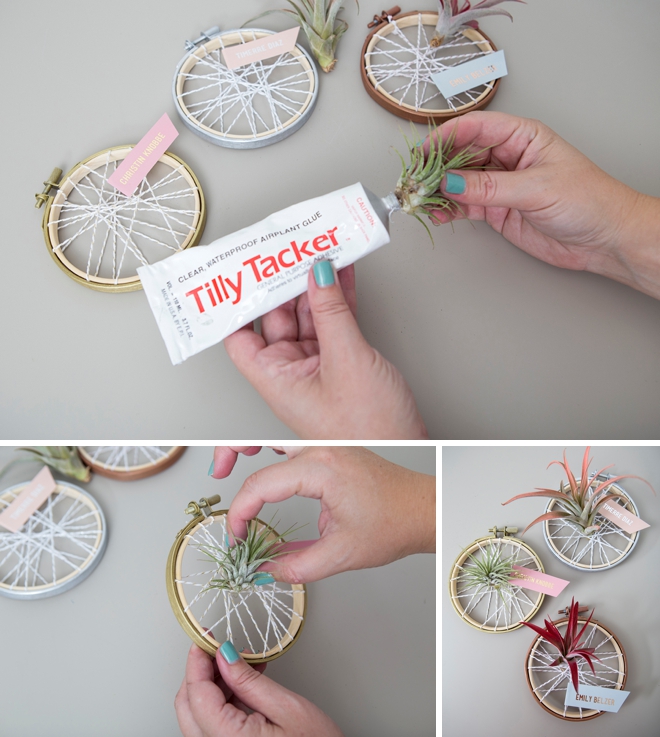
Tilly Tacker is a glue designed exclusively for using with air plants. I guess it’s a unique combination of a clear, waterproof glue that is non-toxic to the plant. I added a nickel sized squirt to the end of each air plant and then pressed the plant into the twine and let them dry overnight.
Timing
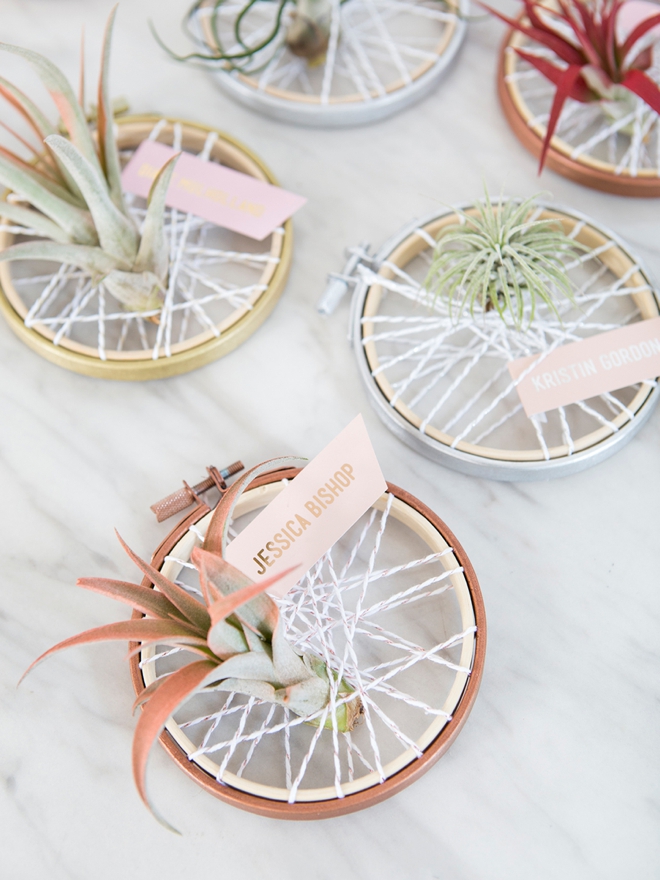
I made 40 of these beauties and with all the time considered it took me about 9 hours. The wrapping of the twine took the longest. One day I painted them all, the next day I wrapped them all, then I did my seating chart and planned out the favors by color and glued them all together. Adding the name tags and the individual air plants was my favorite part!
Guest Display
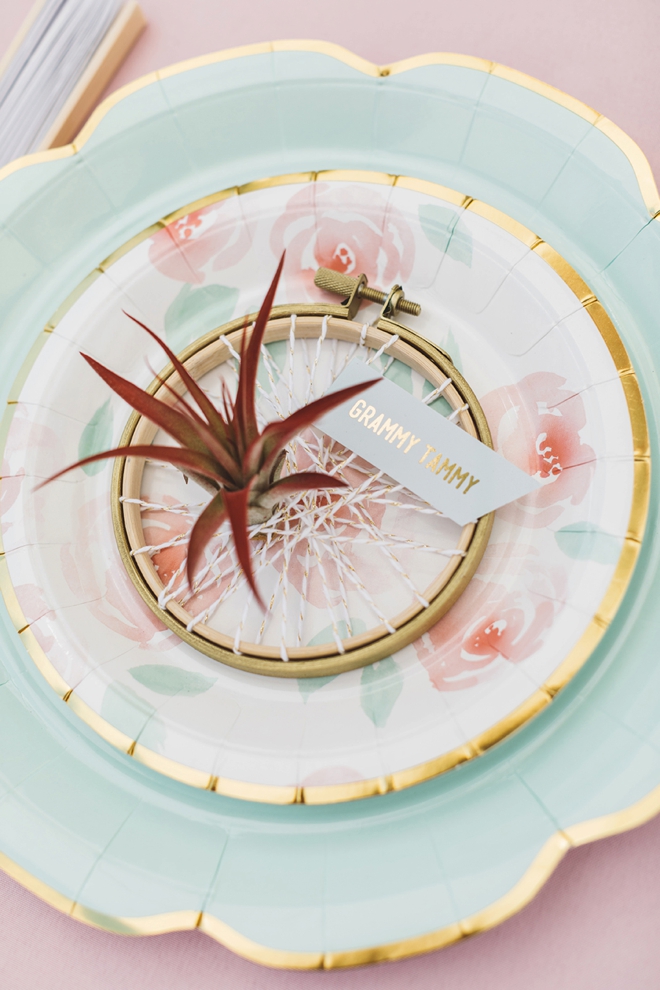
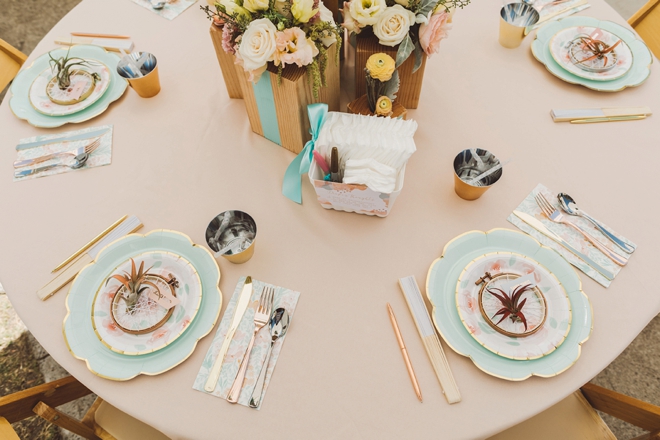
When my guests walked up to the tables they were greeted with these darling hoops that led them to their seat. I even went as far as to make sure that each guest who sat next to each other had not only a different air plant but a different color hoop!
DIY Tutorial Sponsored By:

FiftyFlowers is the customer-centric, online destination for wholesale wedding flowers, shipped fresh from the farm straight to your door! Inspired by the DIY bride, we offer an extensive selection of fresh flowers, greenery, and floral accessories because we believe anyone can create their own wedding flowers.
As with all our DIY tutorials, if you create one of our projects please send us a picture – We Love Seeing Your Creativity! If you use Instagram or Twitter please use the hashtag #SomethingTurquoiseDIY and it will show up on our Get Social page. Happy Crafting!
DIY Tutorial Credits
Photography + DIY Tutorial: Jen Causey of Something Turquoise // Event Photography: Steve Cowell Photography // Bulk Assorted Air Plants: courtesy of Fifty Flowers // 4″ Embroidery Hoops: Amazon // Metallic Twine: Amazon // Tilly Tacker: Eastern Leaf // Metallic Spray Paint: Amazon // Nail Polish: OPI – Withstands the Test of Thyme
Shop The Supplies:
Find the supplies you’ll need for this project from our affiliate links below:


Comments