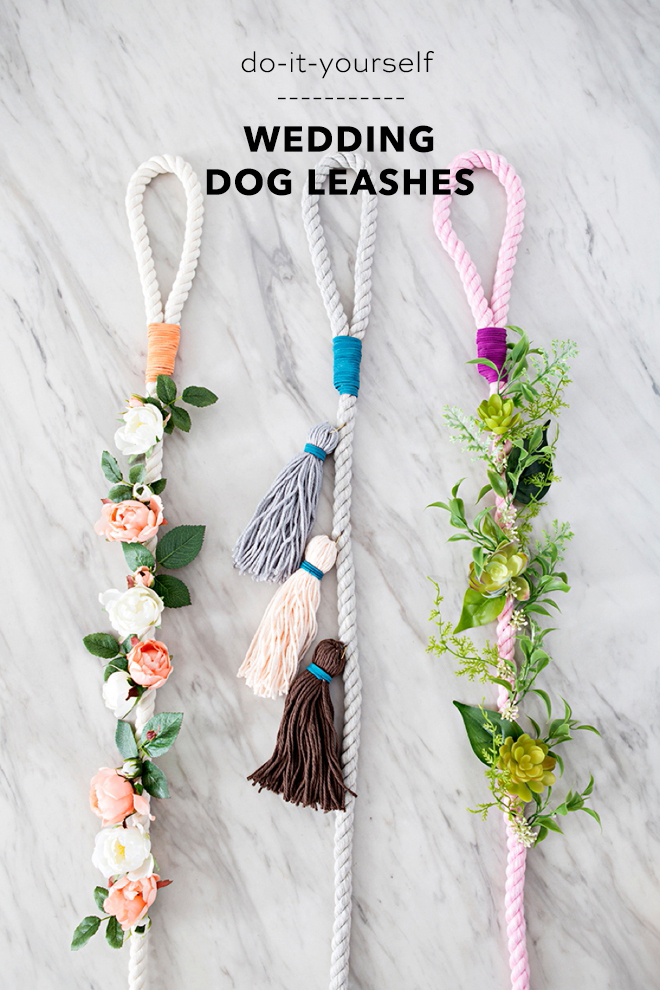
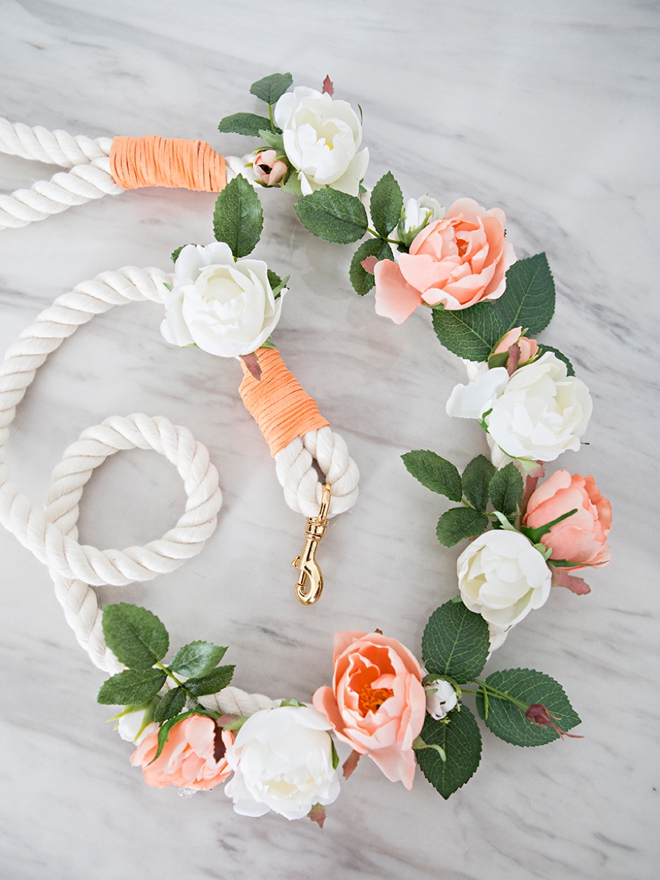
For our brides and grooms whose fur-babies will be walking down the aisle… today’s DIY is a must make! Easily and quickly create your own custom, wedding dog leashes to match your event and add some swagger to your doggies special walk. The pictures will be beyond adorable and most venues require that pups are leashed, so it’s a necessity too – win, win. I wish I had a cute way to disguise the poo bag dispenser, but I think a few baggies can be kept in someone’s pocket for the event. I apologize ahead of time if the doggos get more attention than you do!
Special Thanks
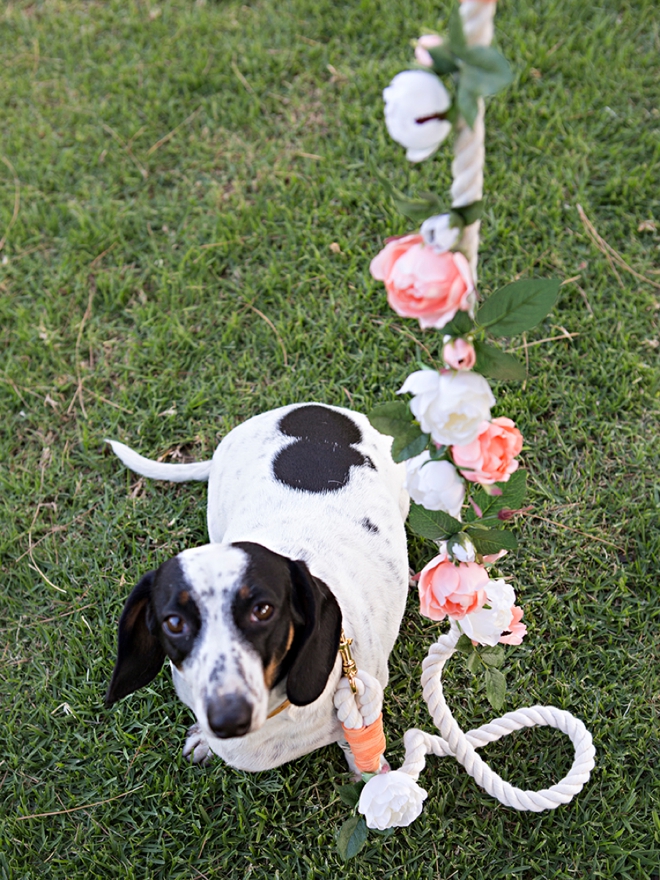
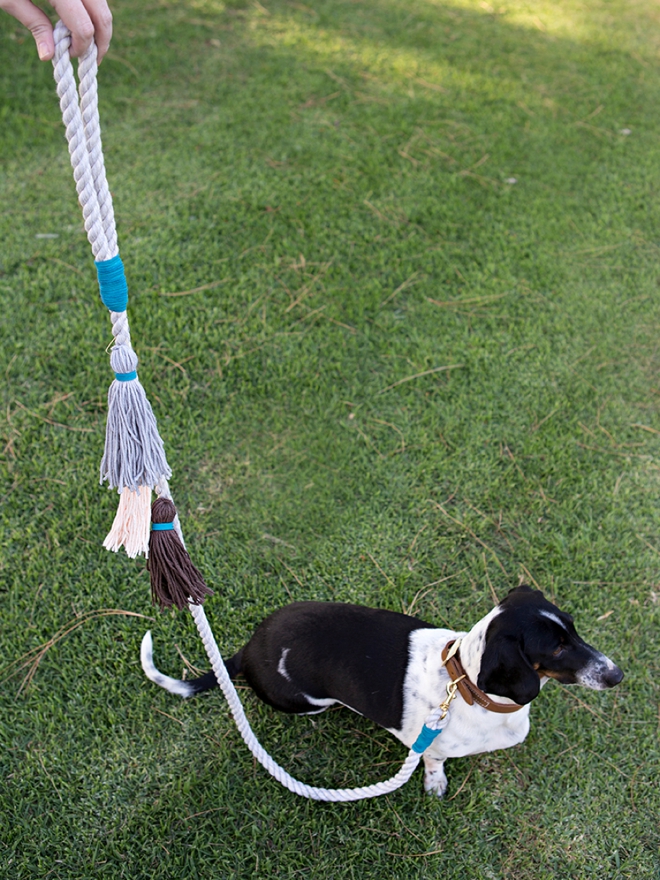
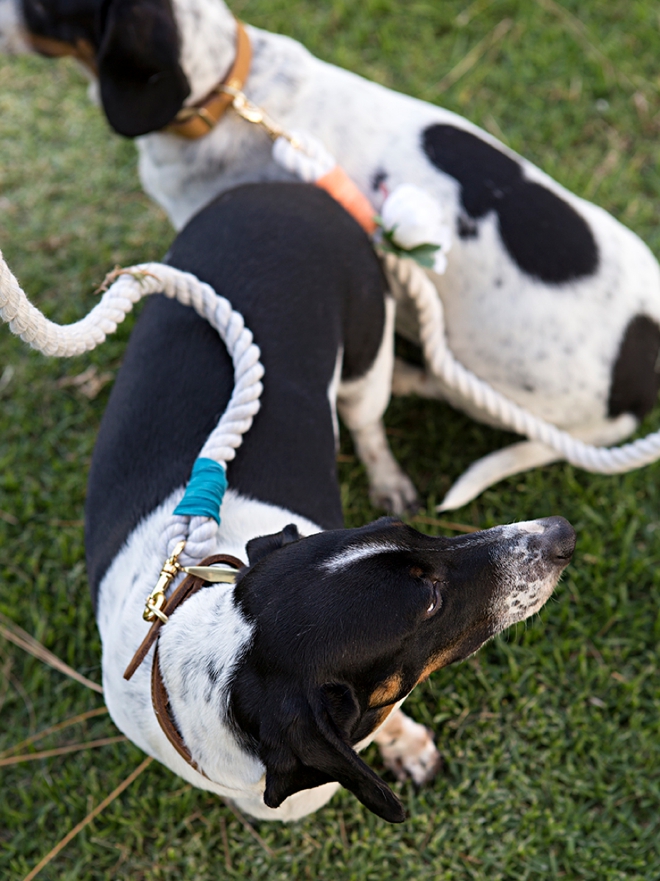
Sending out a special thanks to Scully and Mulder, Shea O’Quinn’s darling Dachshunds who are our leash models today! They were a little confused as to all the attention but sure made these leashes look cute!
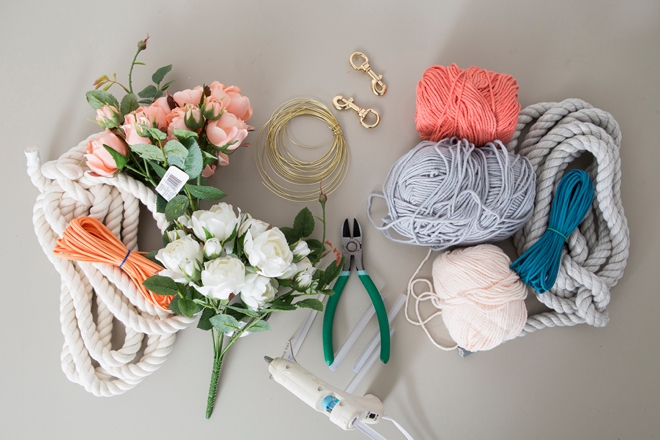
SUPPLIES:
- 1/2″ x 6′ Cotton Rope
- Faux flowers, greenery or yarn
- Lobster Claw Clasp
- Faux Suede Cord
- Wire Cutters
- 20 gauge or heavier wire
- Low-heat Glue Gun (so you don’t burn your fingers!)
- Scissors
Add The Lobster Clasp
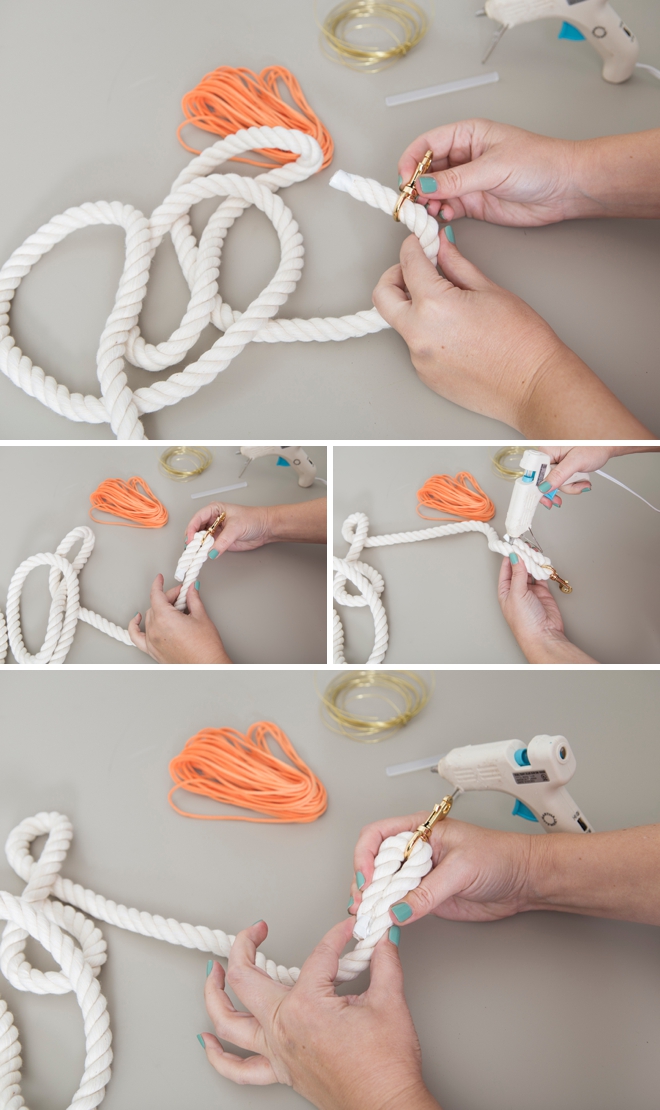
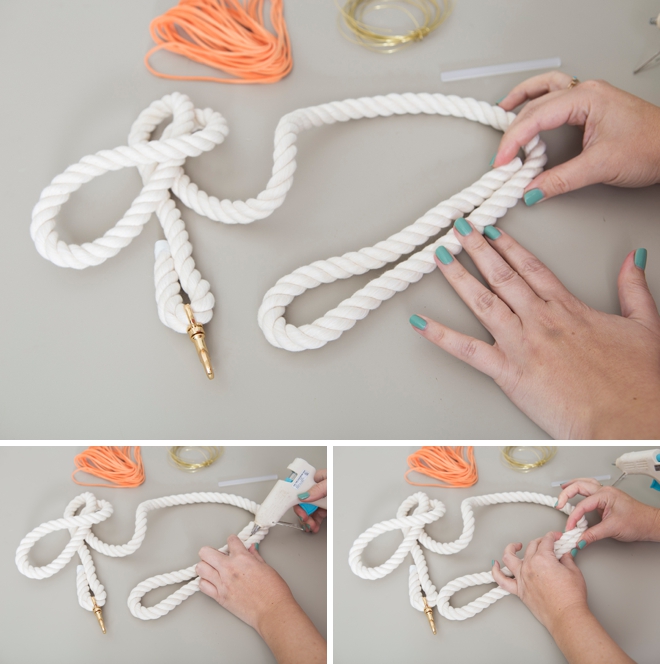
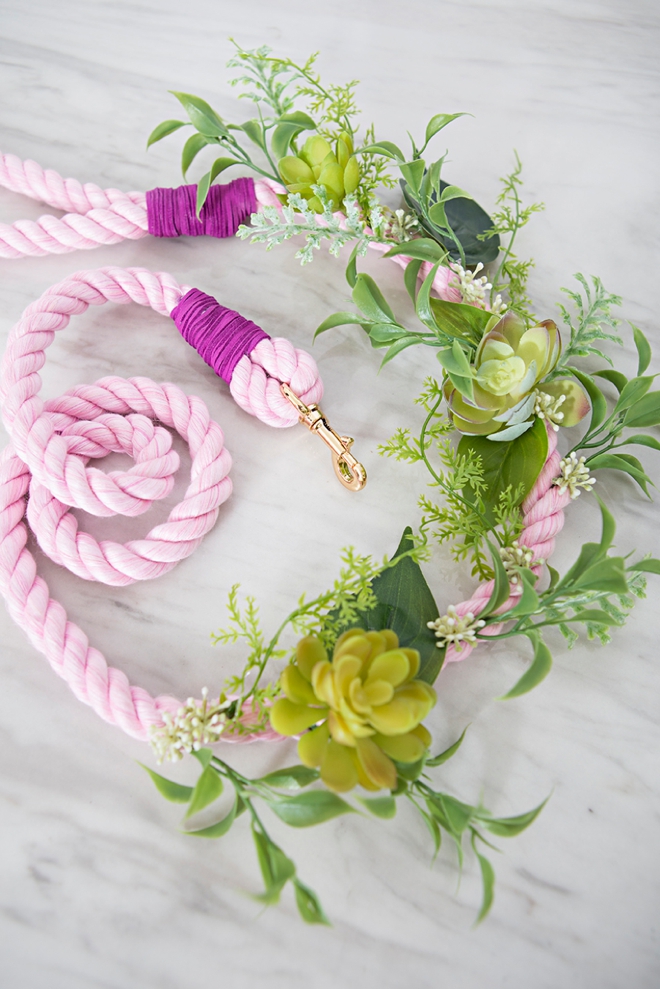
Depending on your dog, the rope should be 5-6 feet long. This exact 1/2″ rope (that is gorgeous by the way) and the exact lobster clasps fit perfectly. Both are linked at the end of the post in the supplies. Slip the lobster clasp onto the rope, then fold the rope over about 3 inches and glue in place.
Make The Handle
Now fold over about 9 inches to make the handle. Glue in place.
Wiring Optional
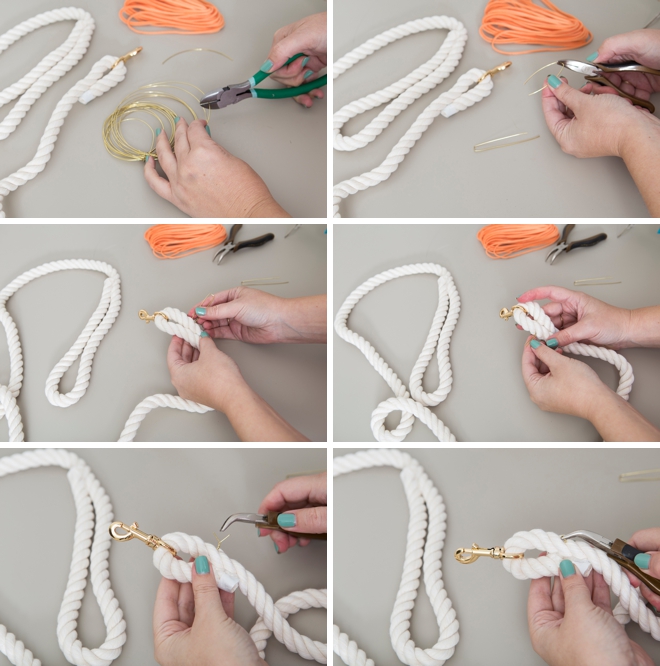
If you have a well mannered fur-baby, this step might not be necessary. If your dog is notorious for pulling and testing your limits on the leash, wiring the ends together might be a smart move. Simply cut a few inches of wire, thread it through both pieces of rope, right above the hot glue and give it a few twists to secure. This will add strength to the leash so that on the off chance your dog goes after a squirrel at your wedding, this DIY leash will stay intact.
Cord Wrap
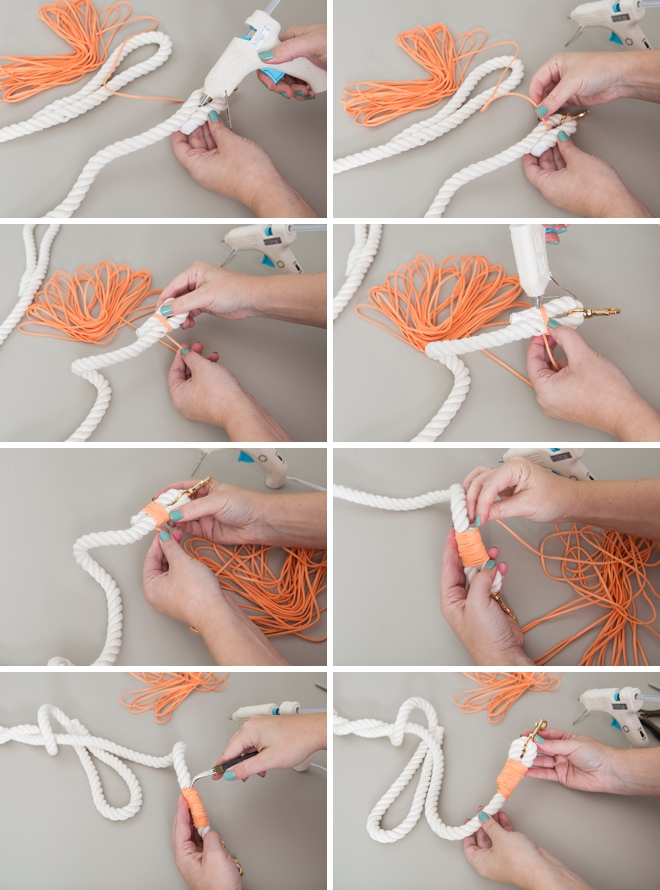
Hide the rope end and add a little color by wrapping the ends with faux suede cord. Start by gluing the end of the cord in between the two pieces of rope, then slowly and tightly wrap and hot glue all the way down to cover the end. Glue about every two times you wrap the cord around the rope. Finish by tucking the end under itself with more hot glue.
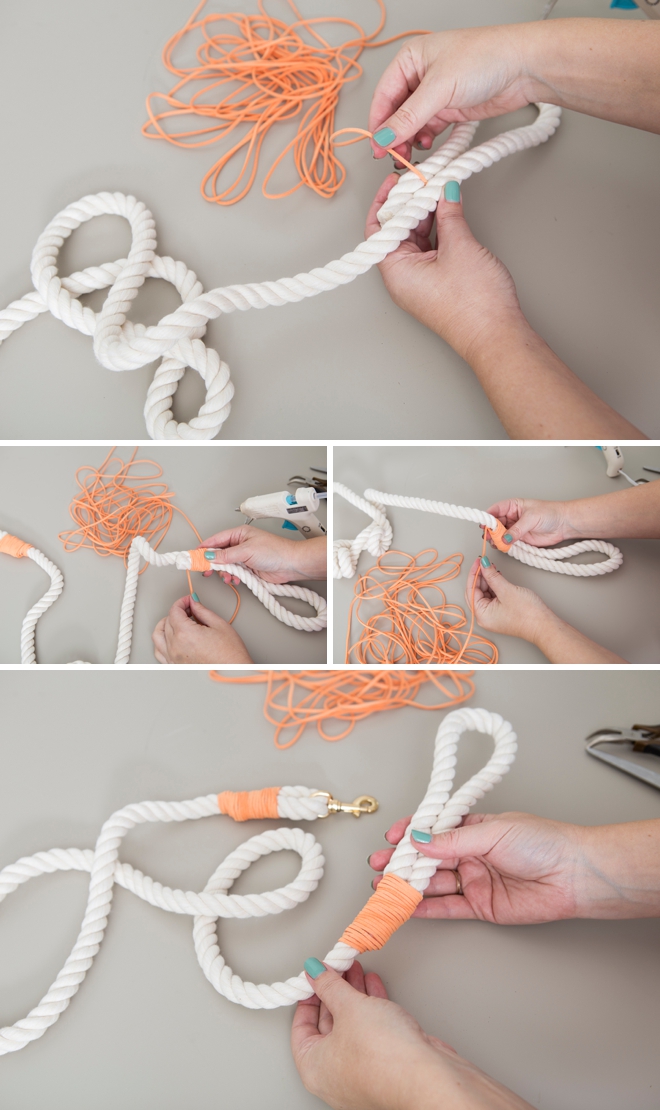
Do the same thing to the handle end…
Add Flowers and Greenery
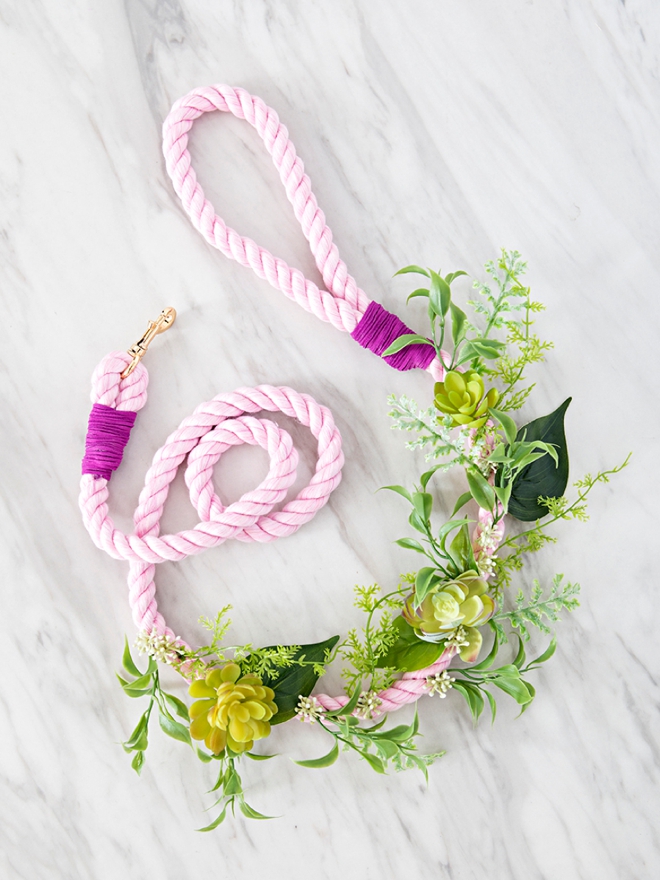
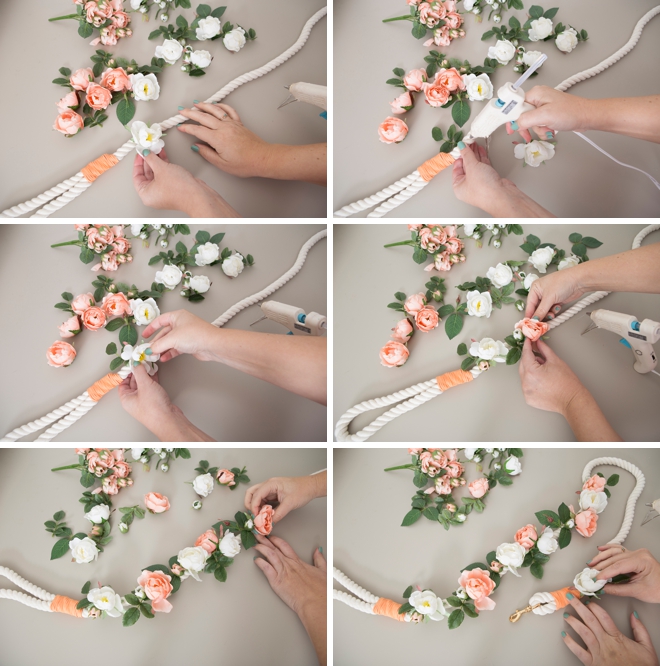
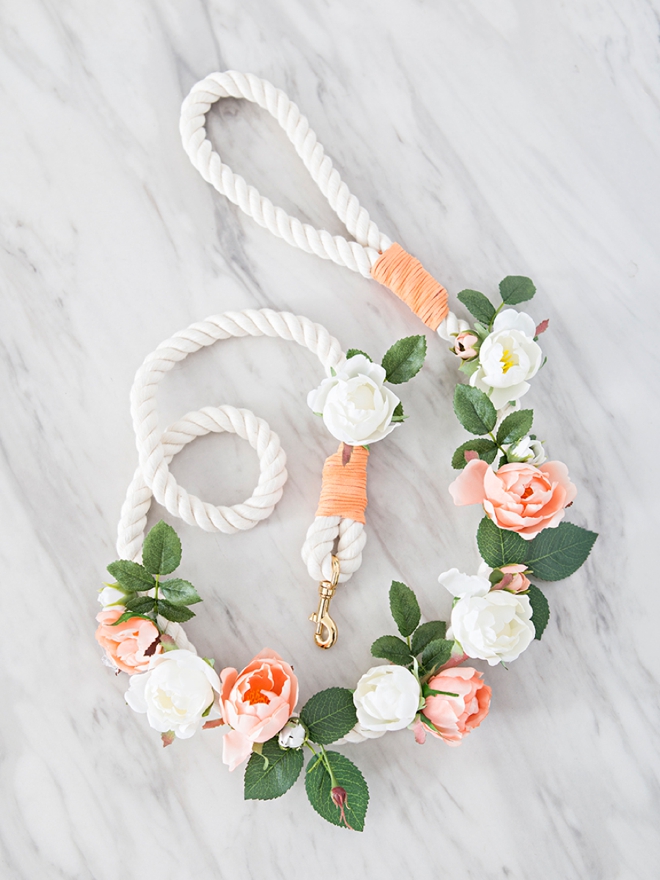
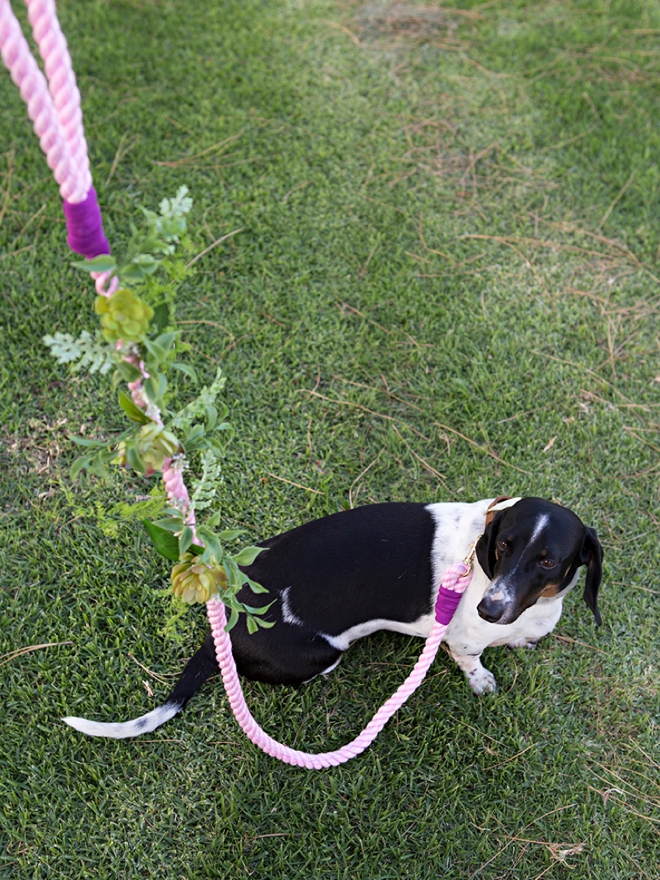
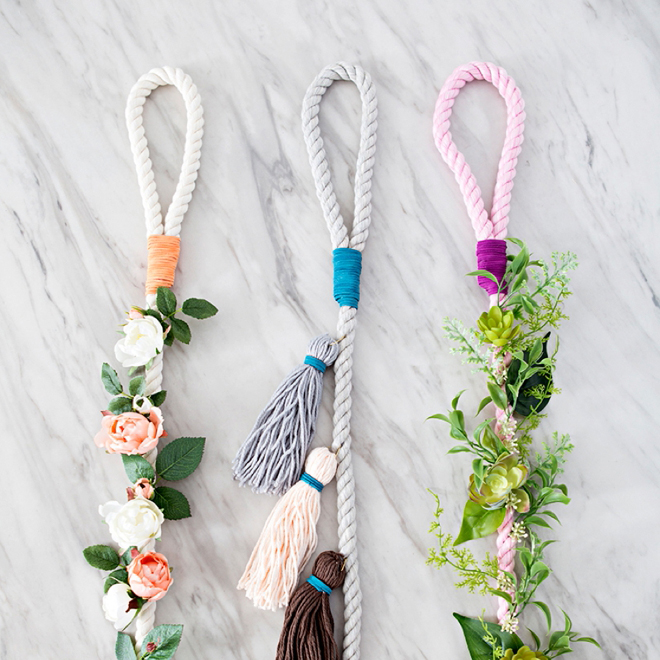
If choosing to add faux flowers or faux greenery to your leash, this would be your last step. Pull apart faux flowers and greenery, snipping the stems down to nubs. Then glue the stems and leaves inside the folds of the rope, making sure to hold each item in place until cool. Add as many flowers as you’d like!
The Tassel Leash
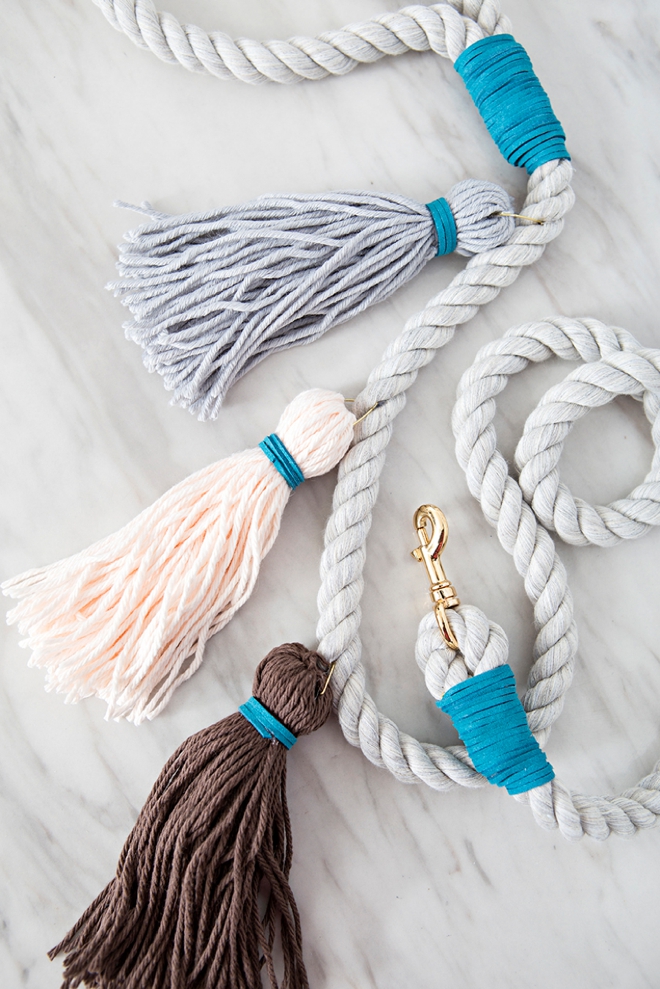
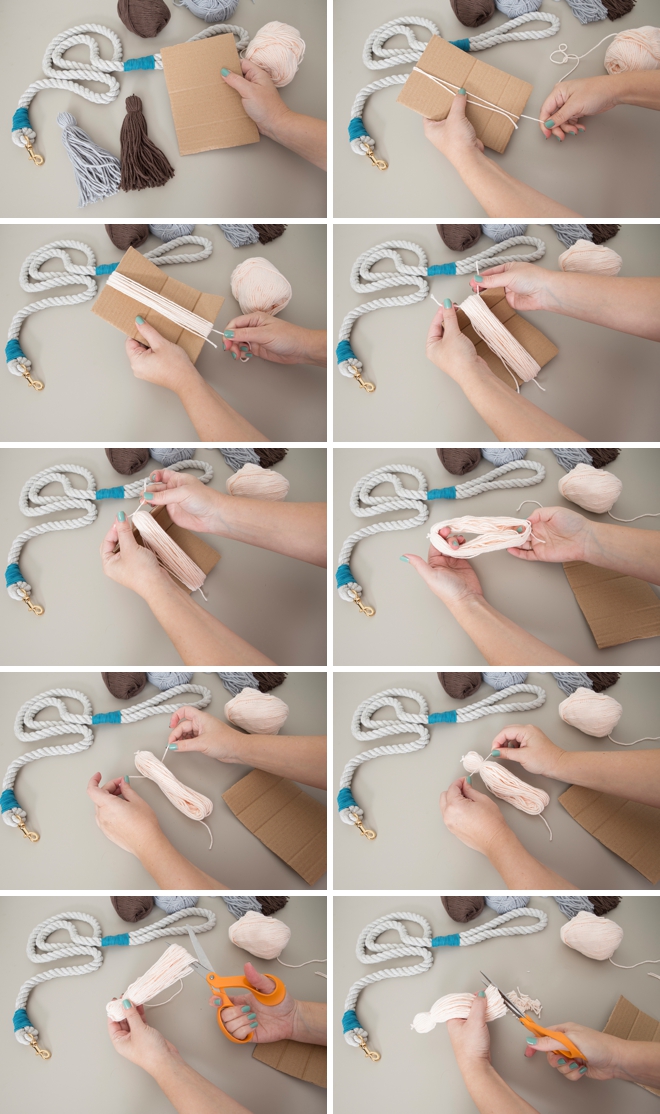
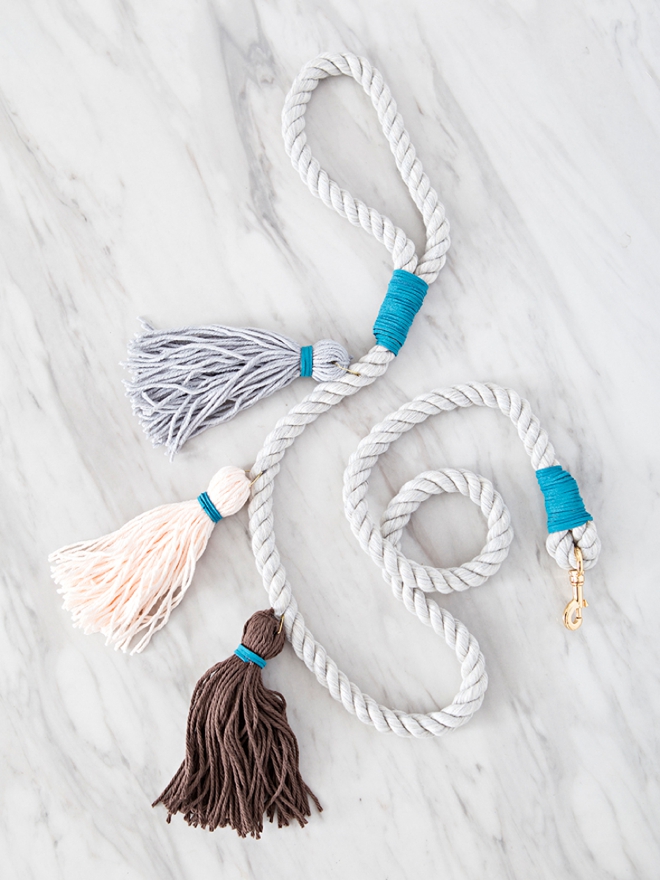
Create the rope leash just like the first steps… and now onto the tassel. Making tassels is fairly simple. Here I used a 7″ x 4″ piece of cardboard to assist me, then I wrapped it 50 times with yarn. Carefully slip a piece of yarn under all the layers to tie a firm knot at the very top. Then gently slide all the yarn off the cardboard. Tie another knot about 1.5″ from the top knot. Then cut the loops free at the bottom of the tassel. Trim the ends to give them a straight look. Make as many tassels as you’d like.
Embellish The Tassel
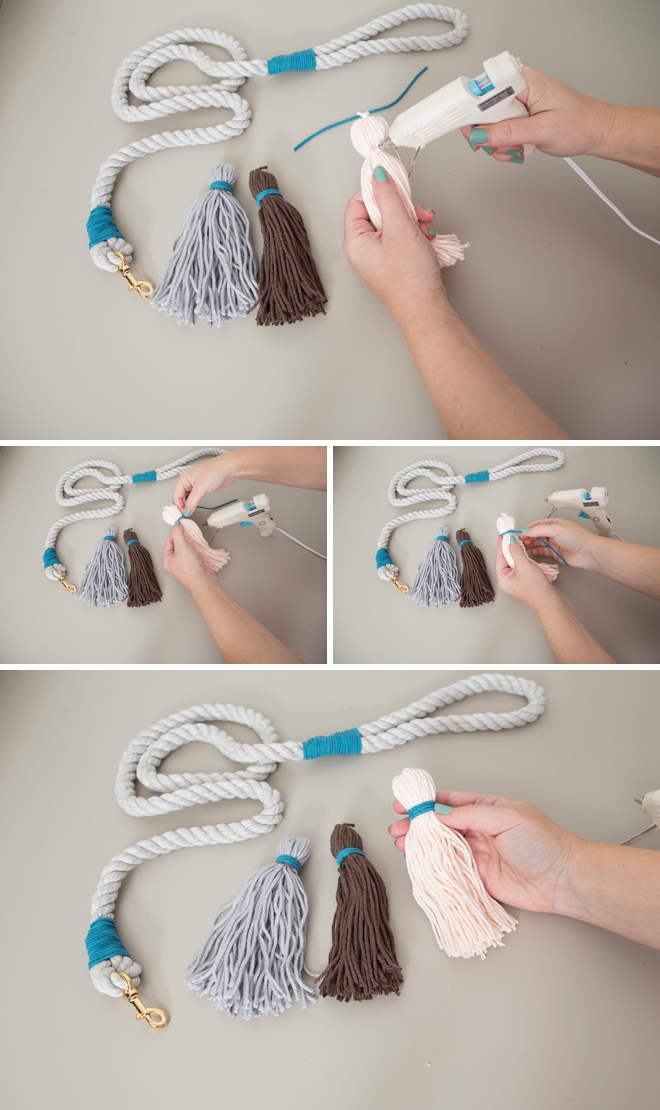
Here I just embellished the tassel with a little faux suede cording in the same color I used for the leash.
Add The Tassels
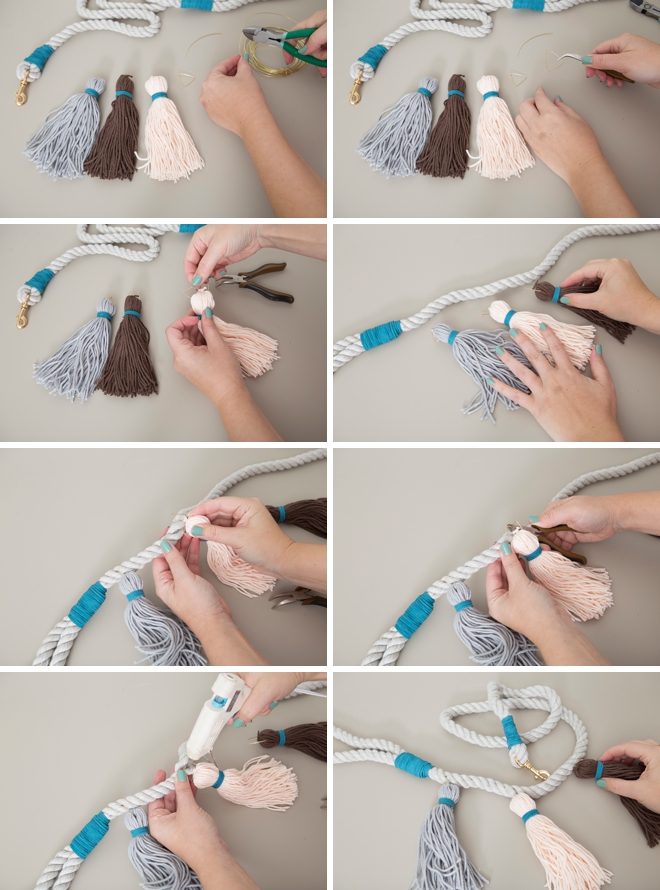
Using the same 20 gauge wire, snip a few inches and fold into a triangle type shape. Slip the triangle into the top of each tassel. Then slip the triangle ends under and into the rope folds. Then bend the ends to make a hook type shape to hook into the rope and glue in place, so these cuties won’t fall off your leash!
The Bark Of The Town
Your special fur-babies are sure to be the “bark” of the town during your wedding, strutting their stuff with fancy leashes like these! During our 15 minute photo shoot, even Scully and Mulder got some added attention!
As with all our DIY tutorials, if you create one of our projects please send us a picture – We Love Seeing Your Creativity! If you use Instagram or Twitter please use the hashtag #SomethingTurquoiseDIY and it will show up on our Get Social page. Happy Crafting!
DIY Tutorial Credits
Photography + DIY Tutorial: Jen Causey of Something Turquoise // Cotton Rope: Amazon // Gold Lobster Clasps: Amazon // Faux Suede Cording: Amazon // Wire Cutters, Wire, Glue Gun, Faux Florals: Michaels // Nail Polish: OPI – Withstands the Test of Thyme
Shop The Supplies:
Find the supplies you’ll need for this project from our affiliate links below:


Comments