-Sponsored Post-
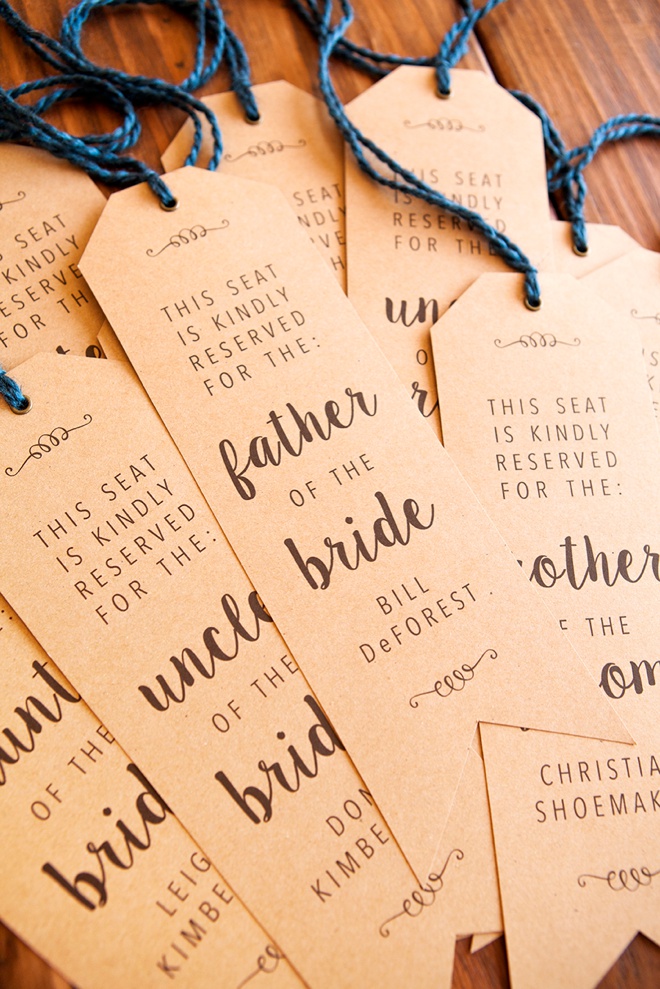
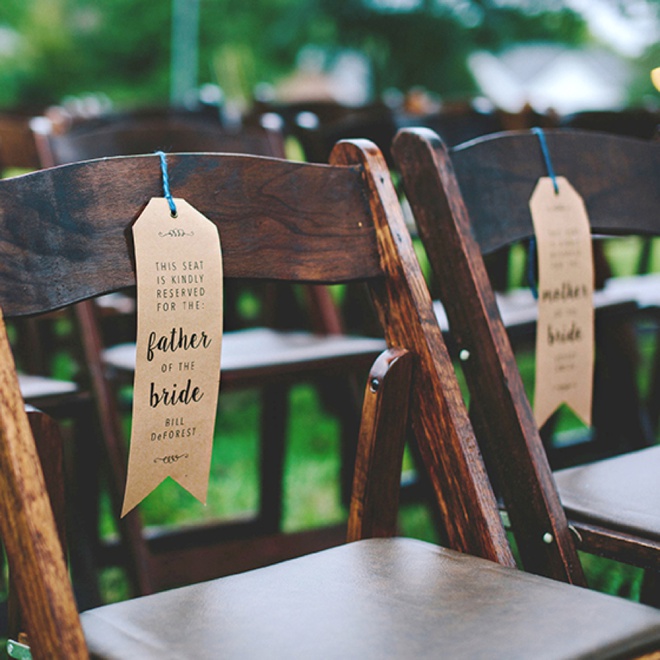
Make sure that Grandma and all the other extra-special guests attending your ceremony, get the seat they should using this lovely idea! Today I’m sharing two free editable downloads that you can print at home and turn into your own custom Wedding Ceremony Chair Reserved Signs! Our lovely bridal blogger Shea, let me create these beauties for her wedding day and had them displayed across the entire front row of her ceremony. Anyone sitting in the front row had a tag with their name on it, to ensure that those closest to them not only felt extra special but also sat in the right seat. Print onto any color paper you’d like and embellish with ribbon, twine or yarn to match. It’s the little details like this that will make your day stand out. This is the third project in our creative DIY series sponsored by Canon, don’t miss the others!
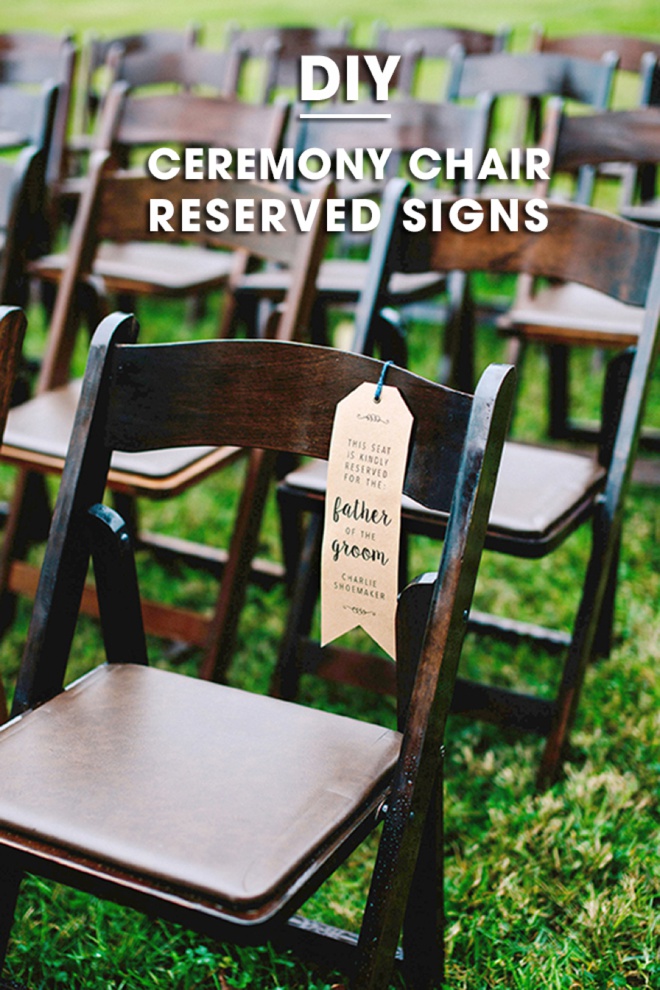
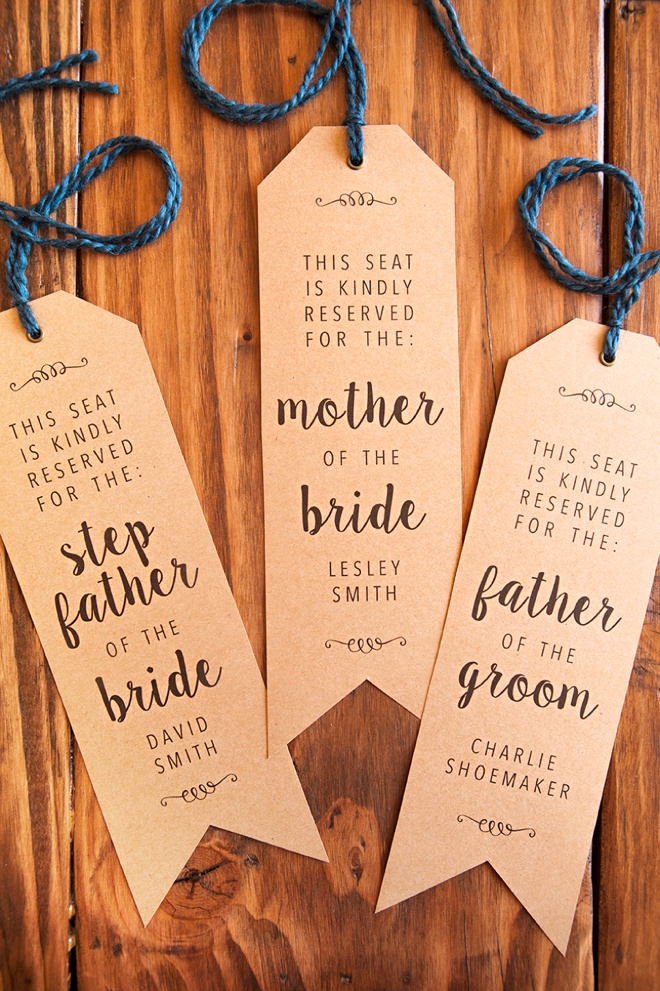
I actually did something similar at my wedding… except it was in the sand on the beach, and we only rented chairs for 26 of our guests. Those closest to us (and the elderly) had their own seats with name tags hung on ribbons, the other 60ish guests stood around us in an intimate circle. It was fabulous… and these tags would have worked perfectly!

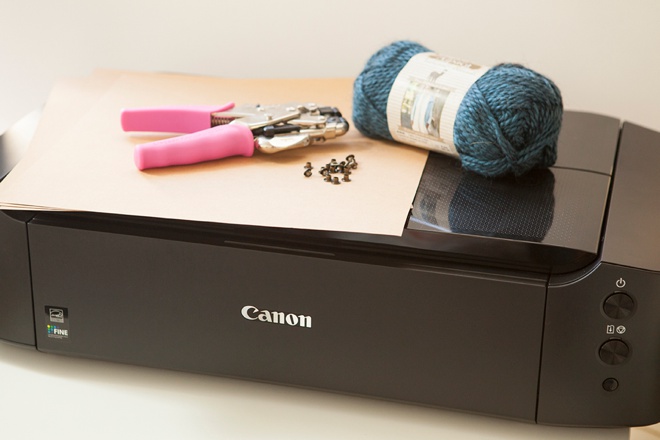
SUPPLIES:
- Canon PIXMA iP8720 Crafting Printer (omg – it prints 13″ x 19″!)
- 12″x12″ Scrapbooking Paper (or 8.5″x11″)
- Yarn, ribbon or twine
- Crop-a-Dile Hole Punch and Eyelet Setter
- Eyelets
- Scissors
Create Your Design
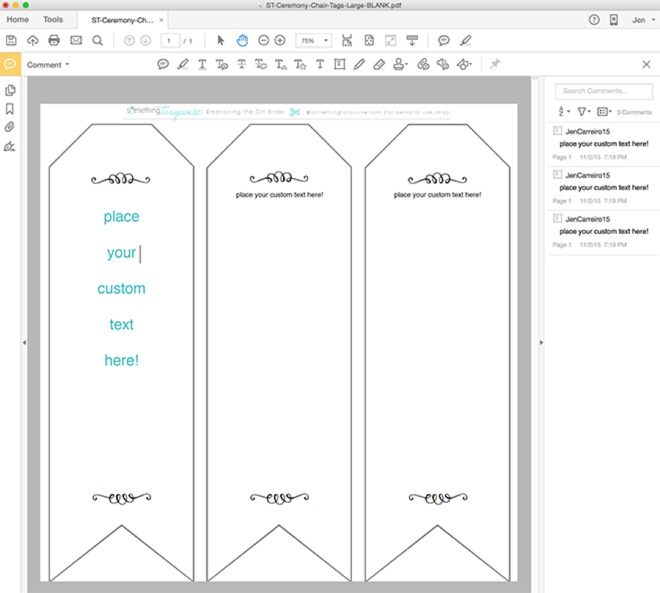
Every wedding has a very unique style, which is why I created today’s free download + print files completely EDITABLE.
- Download the file at the end of the post.
- Open with Adobe Reader or Acrobat and EDIT!
- Click onto Tools, Comment, Edit. You can edit my text boxes or remove them and add your own.
- You can use ANY fonts that are on your computer.
- Save and print!
I used Avenir Next Condensed Regular (comes on a Mac) and Sugar Plums.
Print Your Custom Tags
Of course I’m using the fab Canon PIXMA iP8720 Crafting Printer, but you can use any home printer (you can also take these files to a print shop). I’ve created two printable sizes for you. The ones you see here are printed on 12″ x 12″.
- 12″ x 12″ (since this printer can do it!)
- 8.5″ x 11″ – which are slightly smaller than the ones pictured here
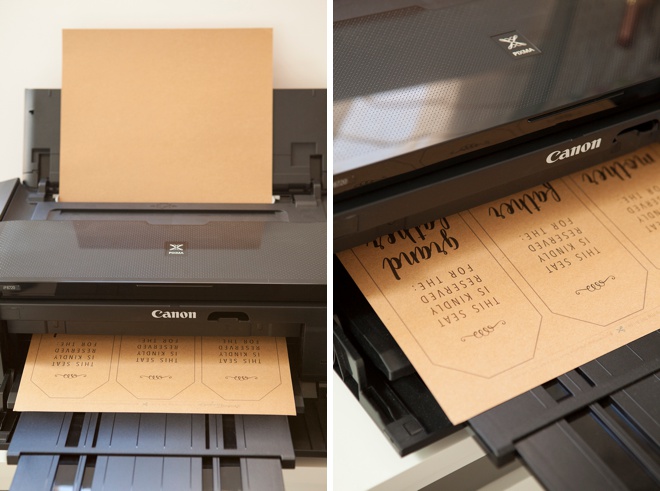
Trim Your Custom Tags
Using scissors or a paper trimmer, cut your tags. These large ones measure 11″ x 3.5″. The small ones measure 10″ x 3″.
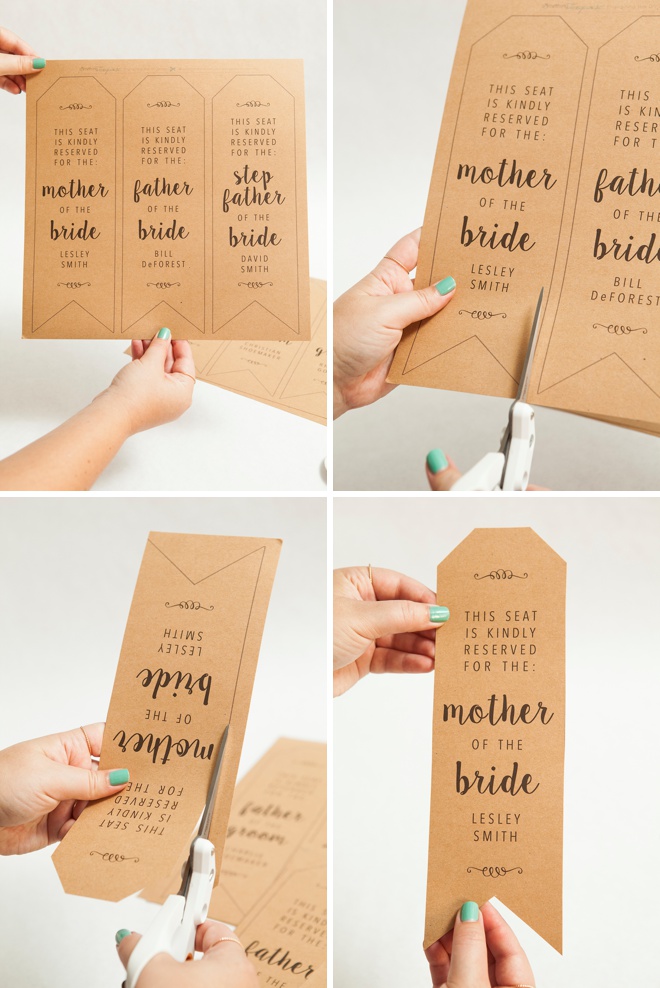
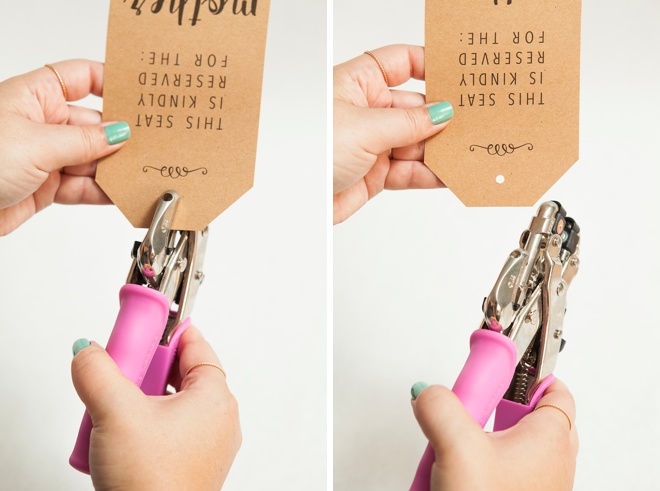
Punch A Hole
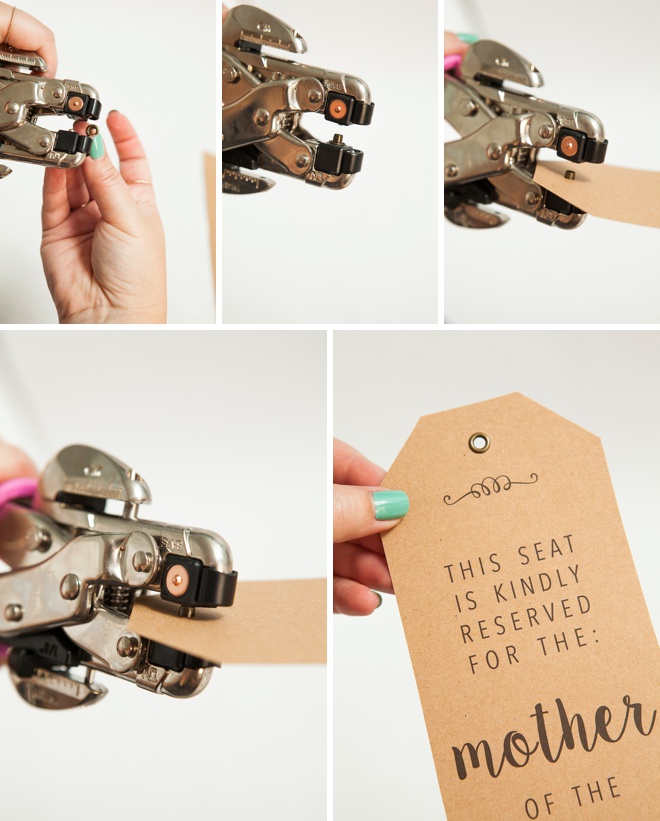
Then Add An Eyelet
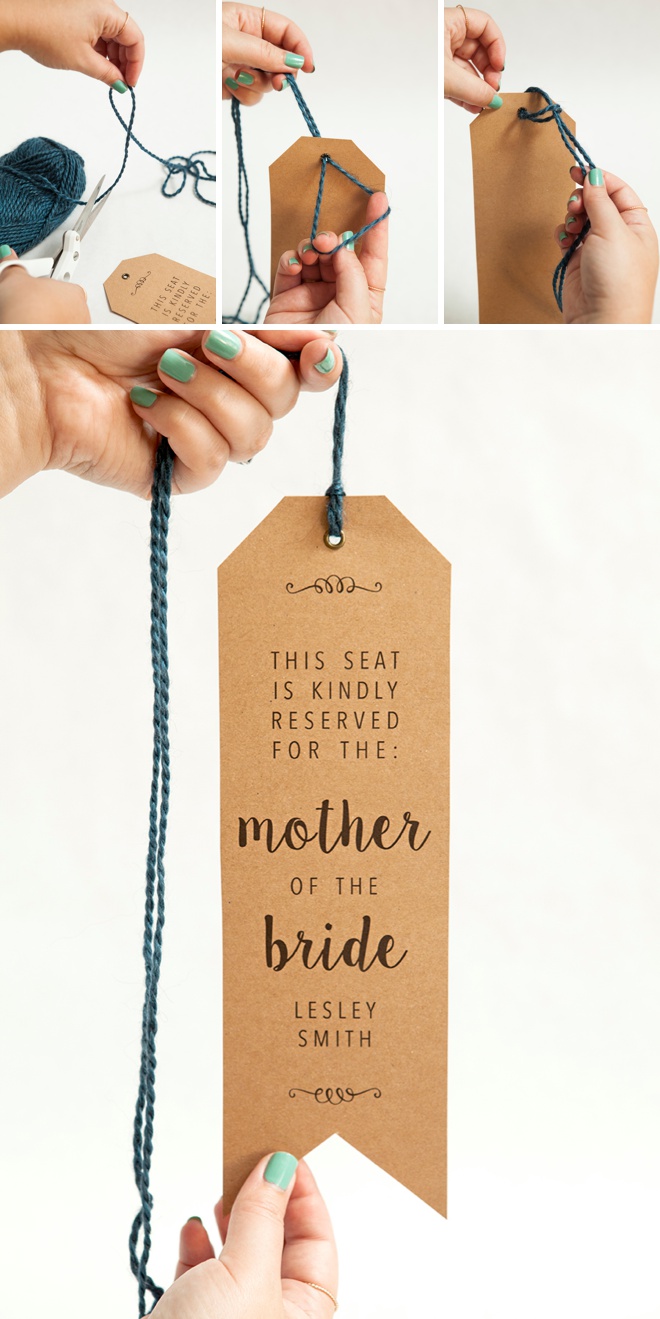
Tie On Some Ribbon
Add twine, ribbon, or yarn like I did here to tie onto each chair. Shea’s wedding planner actually tied them around the top + back with a small bow behind, but pulled the tag to hang in the middle of the chair back – brilliant!
If you are really adventurous you could make one for every single guest! Ok, maybe not… but that would be amazing right!?!
DIY Tutorial Sponsored By:

Canon U.S.A., Inc., prides itself on allowing consumers to create and preserve beautiful imagery, from capture to print. With wireless technology and seamless printing capabilities, you can print your photos and printables with precision and ease.
For those who aren’t computer savvy, we’ve created predesigned uneditable files:
As with all our DIY tutorials, if you create one of our projects please send us a picture – We Love Seeing Your Creativity! If you use Instagram or Twitter please use the hashtag #SomethingTurquoiseDIY and it will show up on our Get Social page. Happy Crafting!
DIY Tutorial Credits
Photography + DIY Tutorial: Jen Carreiro of Something Turquoise // Canon PIXMA iP8720 Wireless Crafting Printer: courtesy of Canon – available at JoAnn // Event Photography of Chairs: Shots by Cheyenne // Fonts used: Avenir Next Condensed Regular (comes on a Mac) and Sugar Plums // 12″ x 12″ Cardstock + Yarn: JoAnn // Crop-a-dile Hole Punch: Amazon // nail polish: OPI – Withstands the Test of Thyme
Shop The Supplies:
Find the supplies you’ll need for this project from our affiliate links below:


Comments