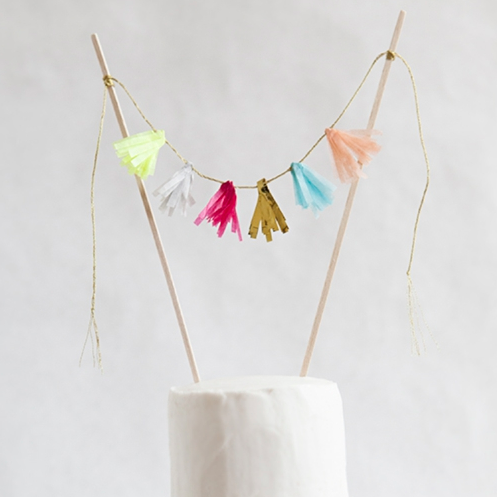
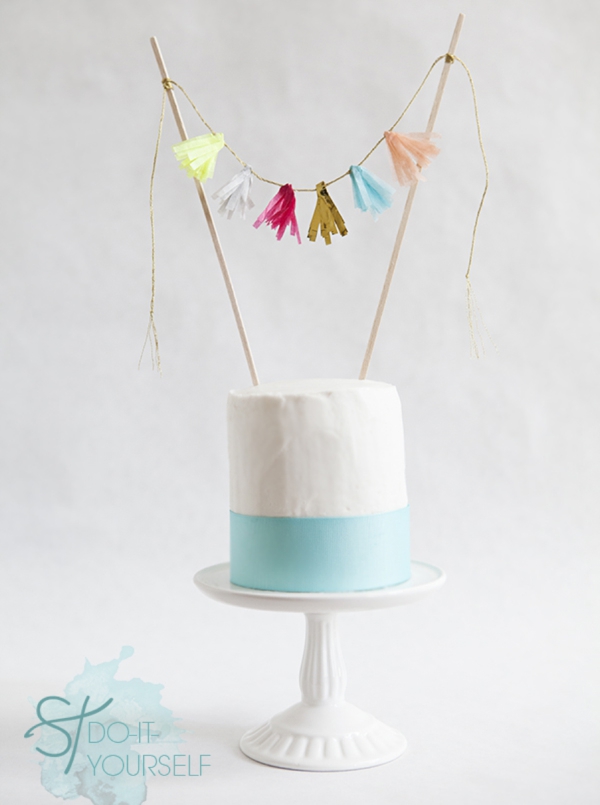
It’s DIY Friday again… my favorite day of the week! Tissue tassel garlands are all the rage right now because they are just so darn adorable and can be made to fit any style or theme of party. Today I will be sharing how to make this darling miniature version of the swag we all love, that will look absolutely perfect a top any style of cake!
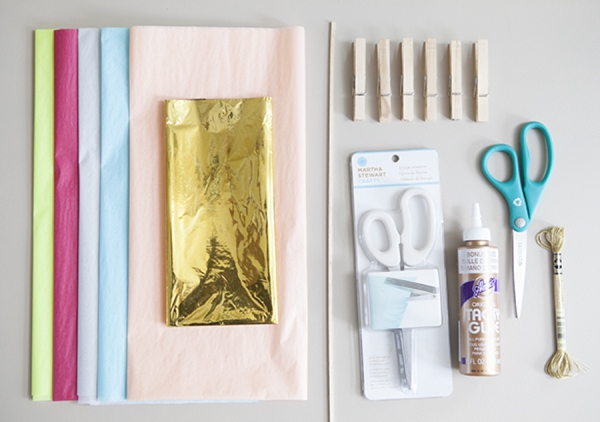
SUPPLIES:
- tissue paper in your favorite colors
- gold or silver mylar sheets (aka. metallic tissue sheets)
- clothespins
- Martha Stewart Crafts Fringe Scissors
- regular scissors
- Tacky glue
- twine or embroidery thread
- 1/4″ balsa dowel or the like
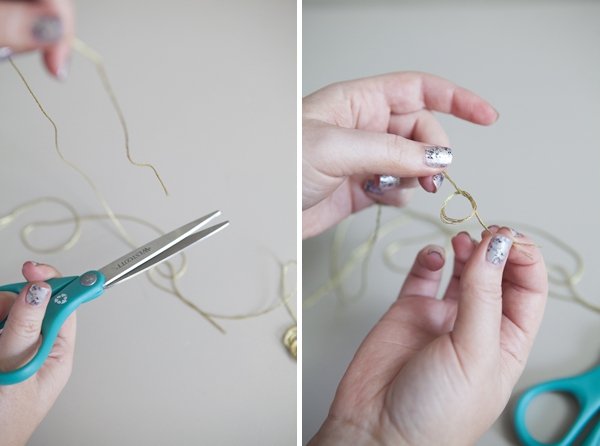
Cut at least 18″ of twine or embroidery thread to hold your tassels. I am working with gold embroidery thread and once cut the ends need to be tied right away, otherwise they will fray.
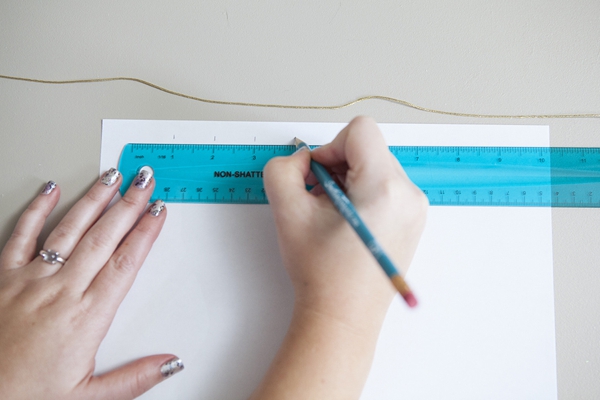
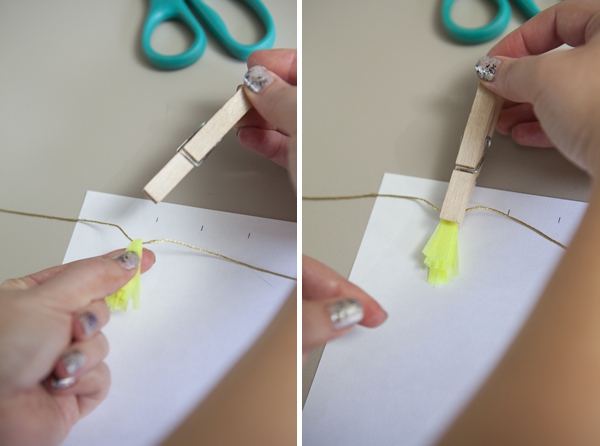
To evenly space each of your tassels, mark 1″ increments on a piece of scrap paper.
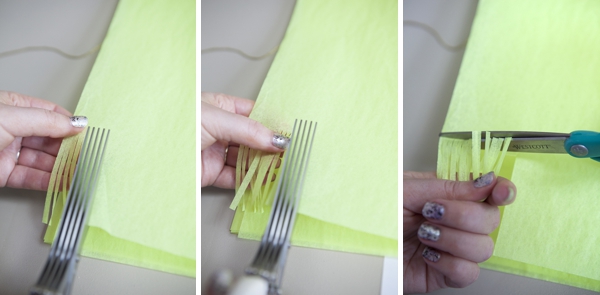
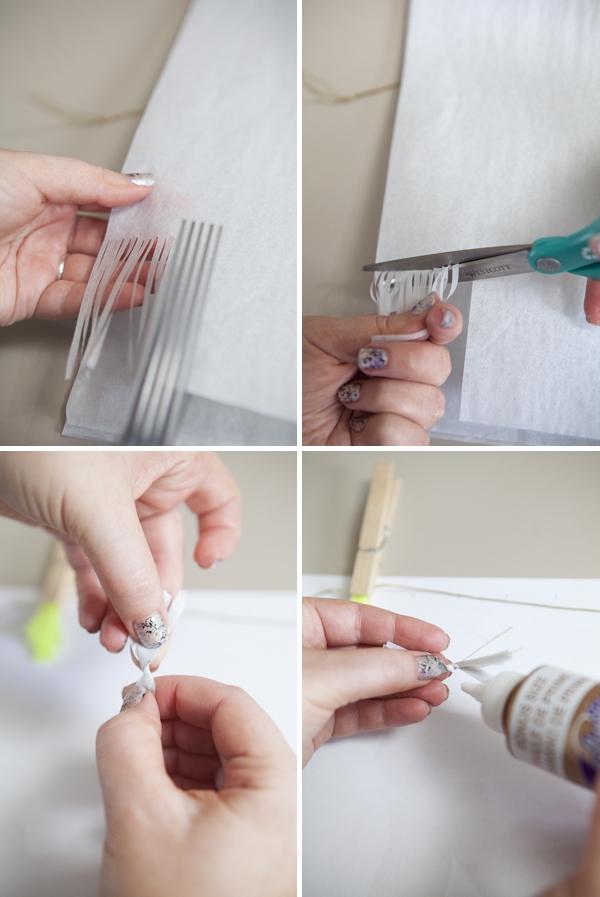
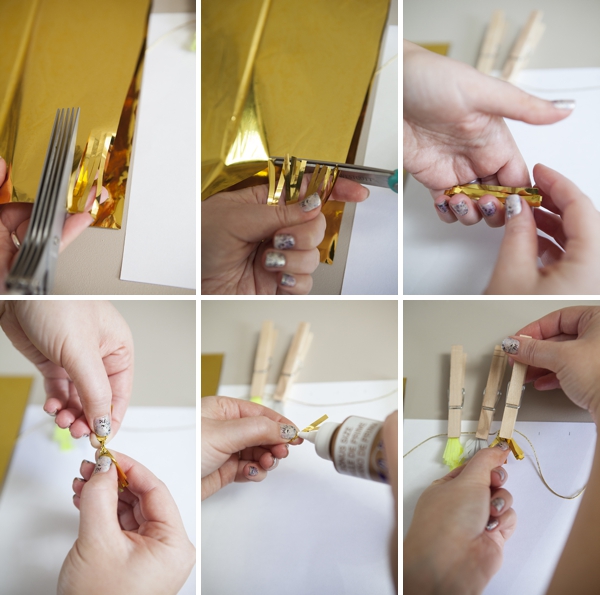
Now the fun part!!! Using your MSC fringe scissors carefully cut one piece of tissue paper three times in a row and then cut the top of the fringe with a regular pair of scissors.
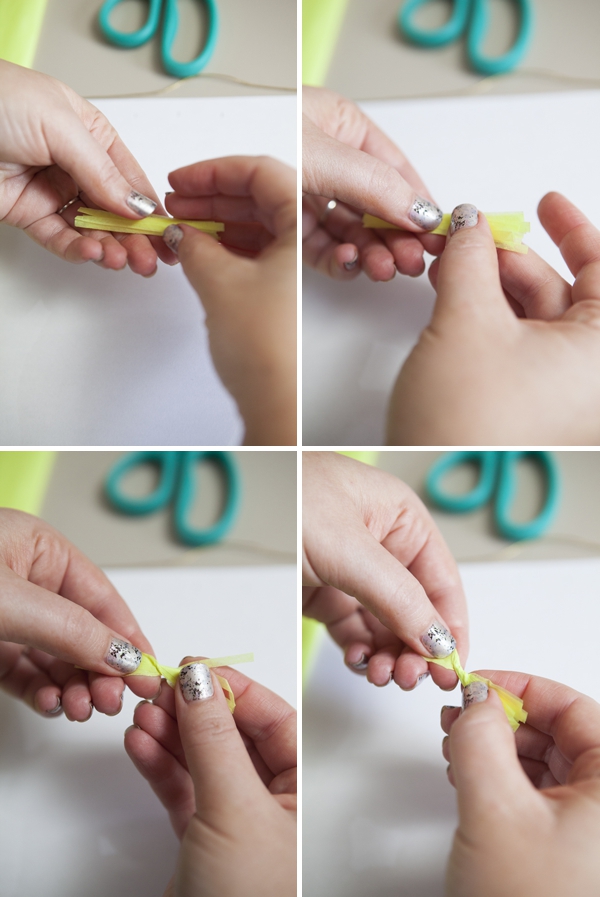
Gather all the mini-strips of tissue together as compact as you can and then twist the strips together two times. CRAFTERS TIP // twisting the fringe two times is VERY important – once glued they will all stay together – one twist is not enough!!!
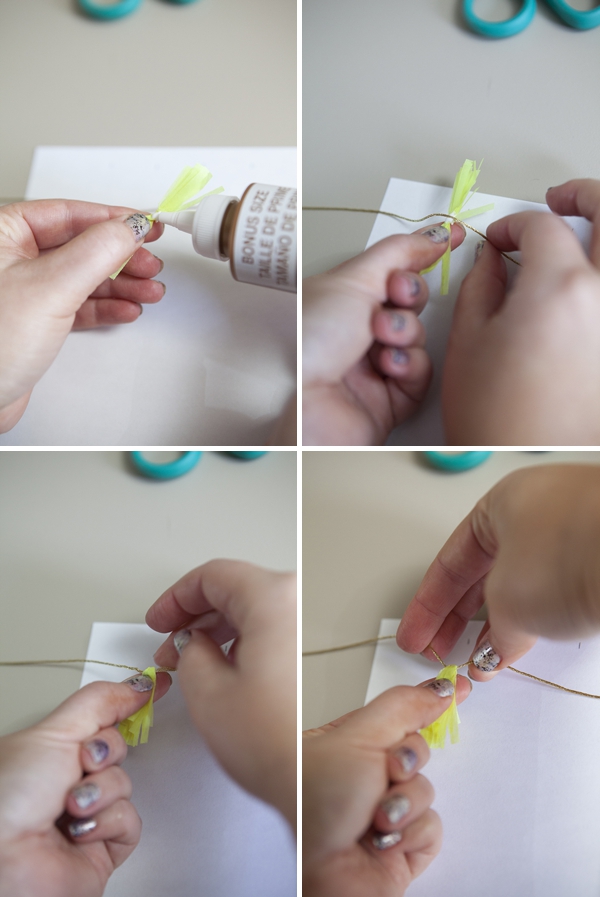
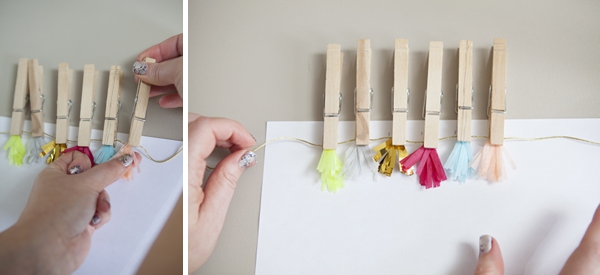
Apply a tiny dab of glue to the center of the twist and then fold the tassel over your twine or embroidery thread.
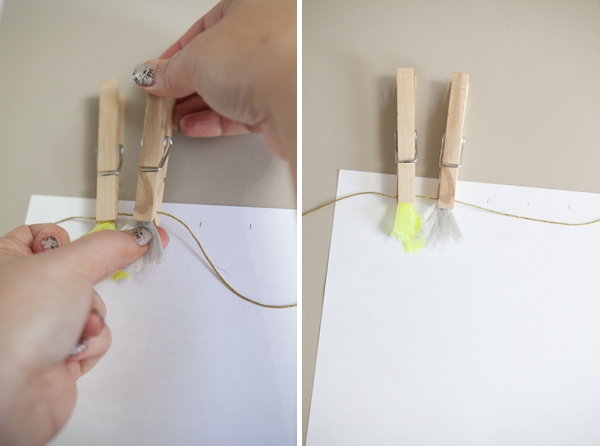
Pinch the tassel with a clothespin to help hold it all together while drying.
Onto the next one… same steps… cut the tissue with the fringe scissors three times, gather the strips together, twist two times, glue and fold!
Using your 1″ markings make sure that your tassels are evenly placed.
Repeat the steps for all your colors of tissue paper…
Let the glue dry for at least an hour. Be careful when you remove the clothespins, sometimes they can stick a little to the paper. If any strips come off add a tiny bit more glue and let dry…
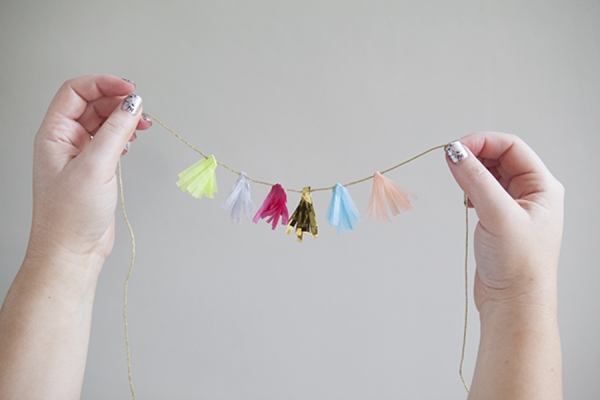
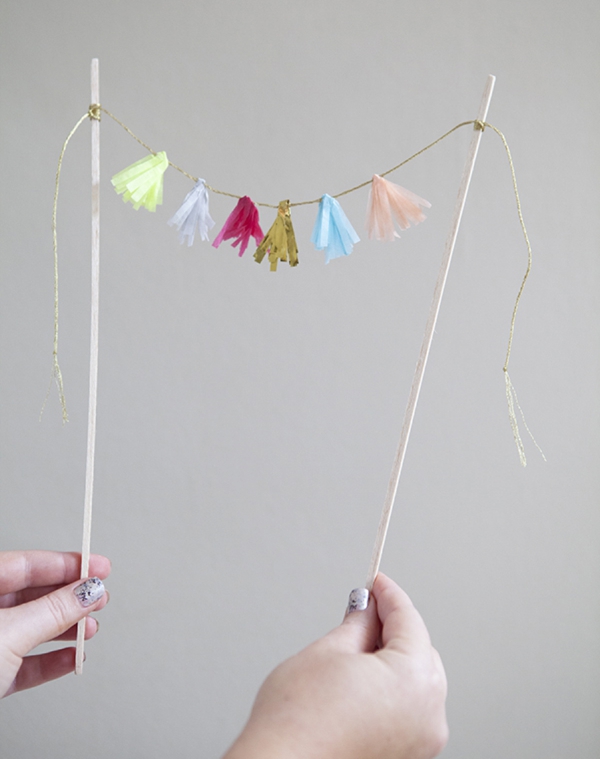
There you have it! A darling, miniature tissue tassel garland!
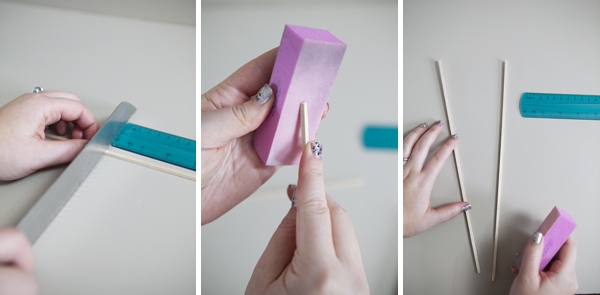
Cut two 12″ pieces of dowel and sand the edges nicely with a nail buffer.
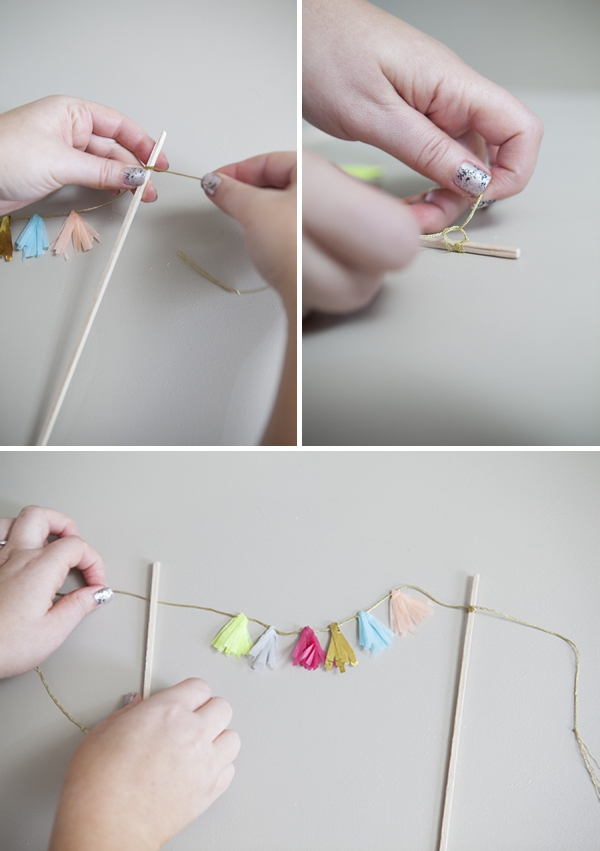
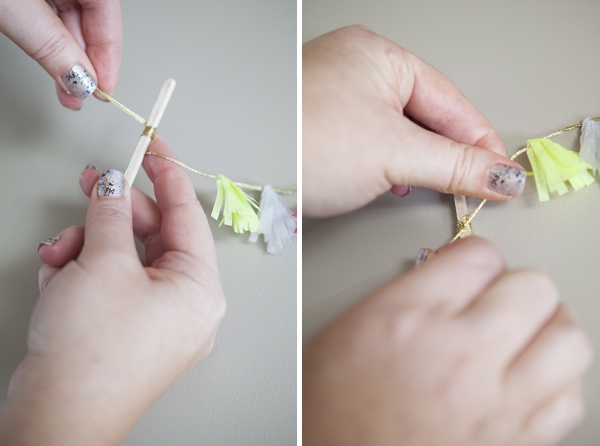
Wrap the twine or embroidery thread around the dowel three times and then tie two knots.
I did mine about 2″ from the first tassel. Cut the ends of your twine or thread if you’d like.
Isn’t it just darling!
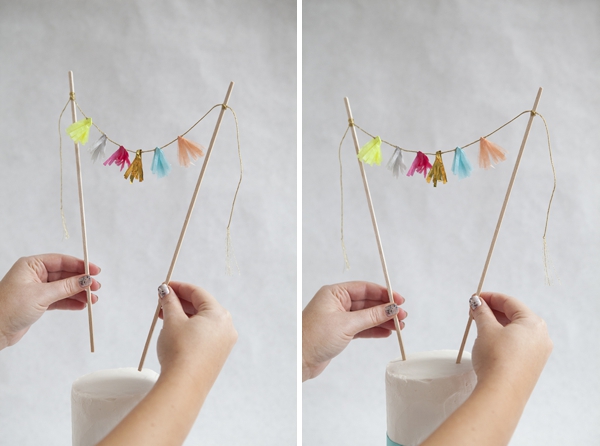
Carefully place the dowels into your cake at least 4″ deep.
As with all our DIY tutorials, if you create one of our projects please send us a picture or a trackback – We Love Seeing Your Creativity! If you use Instagram or Twitter please use the hashtag #SomethingTurquoiseDIY. Happy Crafting!
Photography: Studio 11 Weddings // DIY tutorial by: Jen | Something Turquoise // Martha Stewart Crafts Fringe Scissors, gold embroidery thread and the wood dowel: Michaels // gold mylar tissue sheets: Alin Party Supply (you can find these metallic sheets all over the internet!) // tissue paper (yellow: Limon, gray: Cool Gray, hot pink: Boysenberry, blue: Aquamarine, peach: Peach) : Bags & Bows.com // cake: my Mom made it for me // cake stand: Martha Stewart Collection, Bird Dome Cupcake Stand: Macys // nail polish: Sally Hansen Salon Effects Nail Polish Strips, Sweet Marble Floret


Comments