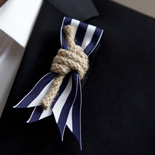
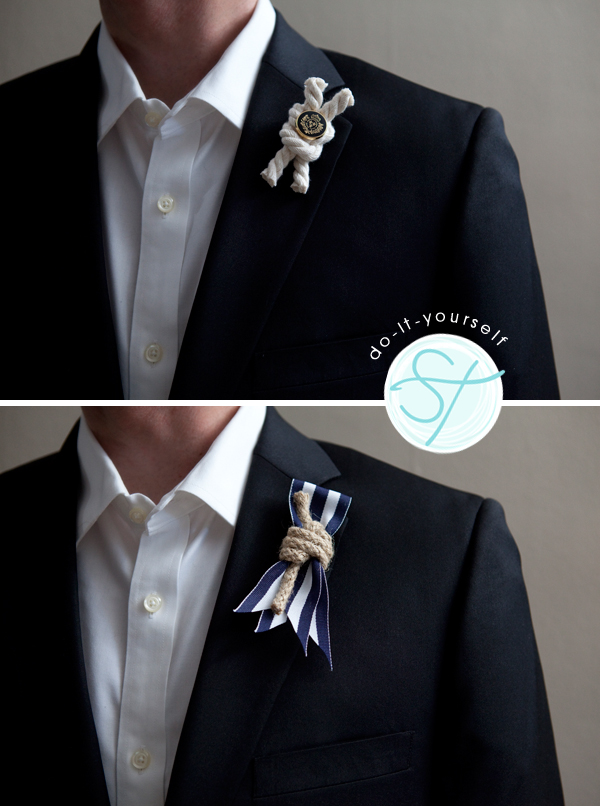
Happy DIY Friday everyone! I am so excited about today’s do-it-yourself project because it is so quick, cheap, easy… and just adorable! These nautical theme boutonnieres will surely enhance your seaside event!
{ Ribbon + Heaving Knot }
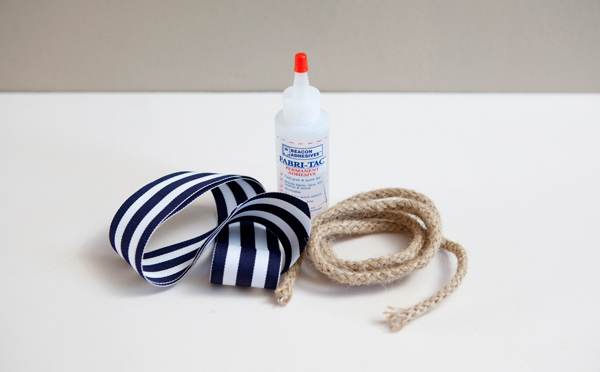
Supplies: your choice of ribbon, nautical looking craft rope, and Fabri-tac fabric glue.
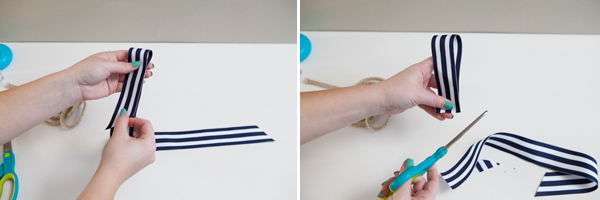
Start by cutting about 12″ of ribbon, or 6″ folded in half… this is just a rough cut.
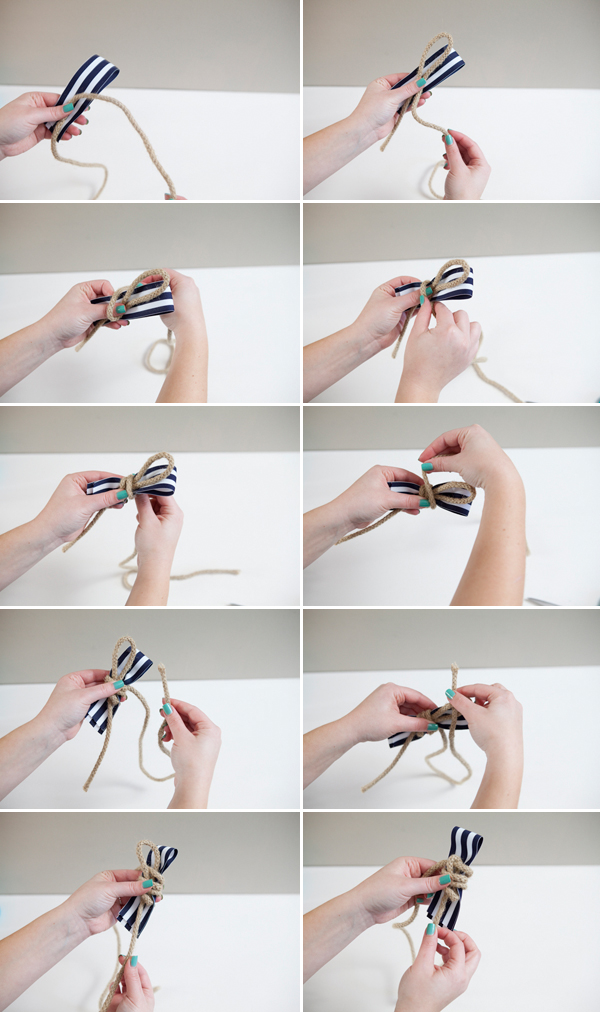
Now we are going to tie the heaving knot around the ribbon, this is very easy and I love the way it looks! To watch an animated clip of how to tie this not click {here}. Start with a loop up against the ribbon, take the right side of the rope and wrap it around itself and the ribbon three times, then place the end of the rope through the begining loop, and pull the opposite end of the rope tight – adjust your knot as needed.
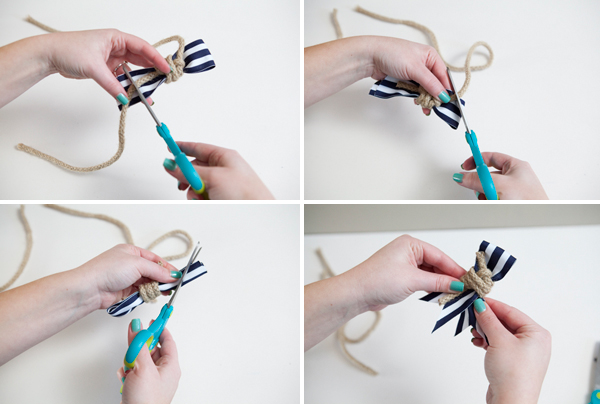
Once the knot is pulled tight, cut each of the ends of the rope about 3/4″ past the knot itself. The rope that I used cut very nicely and didn’t fray at all… some will fray and you will need to to glue the ends a bit – just like the next style. Also cut the ends of your ribbon at a point, slightly pull the ends of the ribbon apart to make the cut stand out.
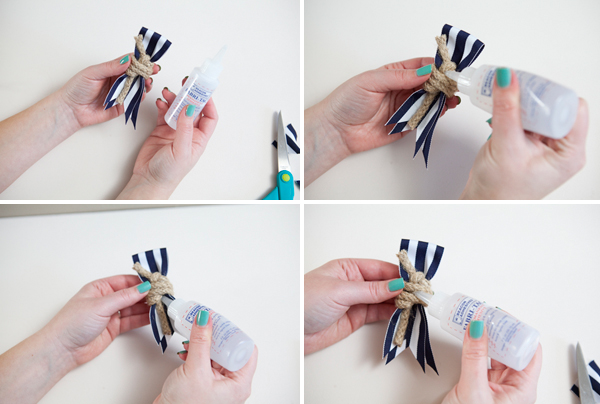
Next using the super strong Fabri-tac glue, work around the knot and the ribbon, adding a bit of glue here and there to make it secure – and if your ends fray make sure to add a bit of glue to them as well.
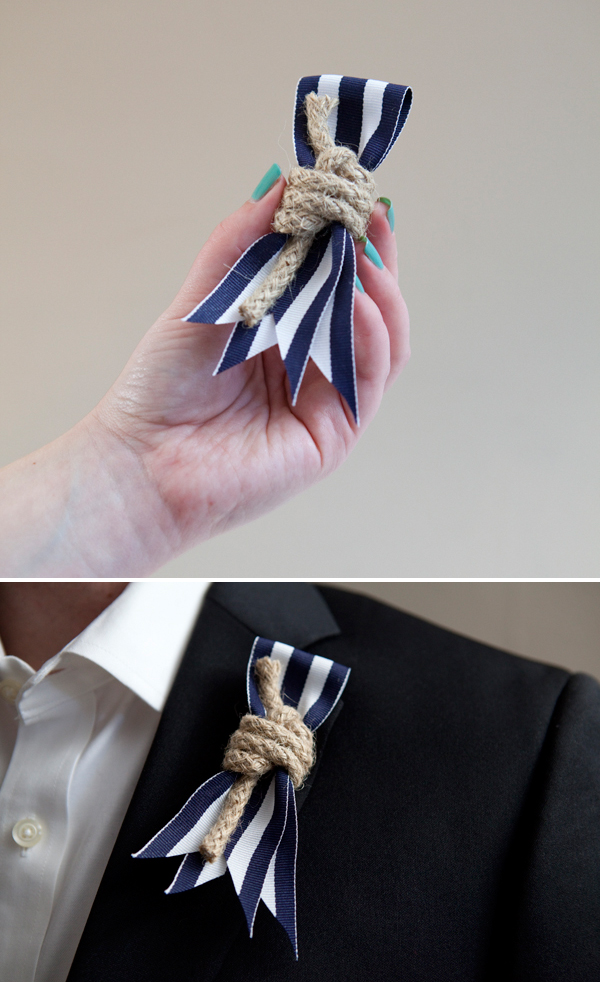
That’s it! I just love this style!!!
{ Nautical Rope + Classy Button + Square Knot }
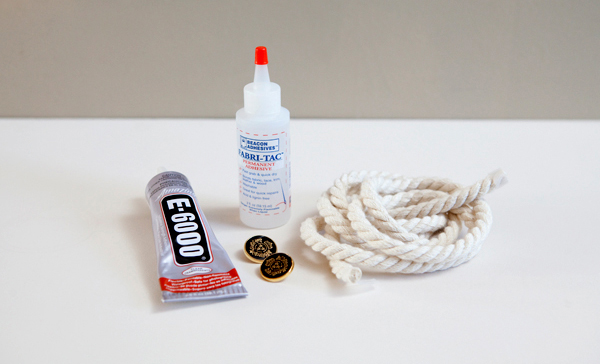
Supplies: thick nautical craft rope, a classy looking button, E600 glue and Fabri-tac fabric glue
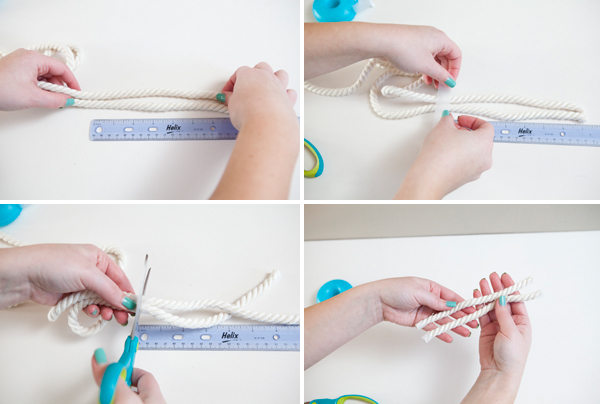
Start by cutting two 7″ lengths of your nautical rope. The rope I used frayed really bad when cut. Before you cut this type of rope it is best to wrap each piece with tape – then cut right across the tape. This holds the fraying area together and will give you a chance to glue it before it frays. To find out if your ribbon frays or not, cut a little bit off the end of your rope and see what happens!
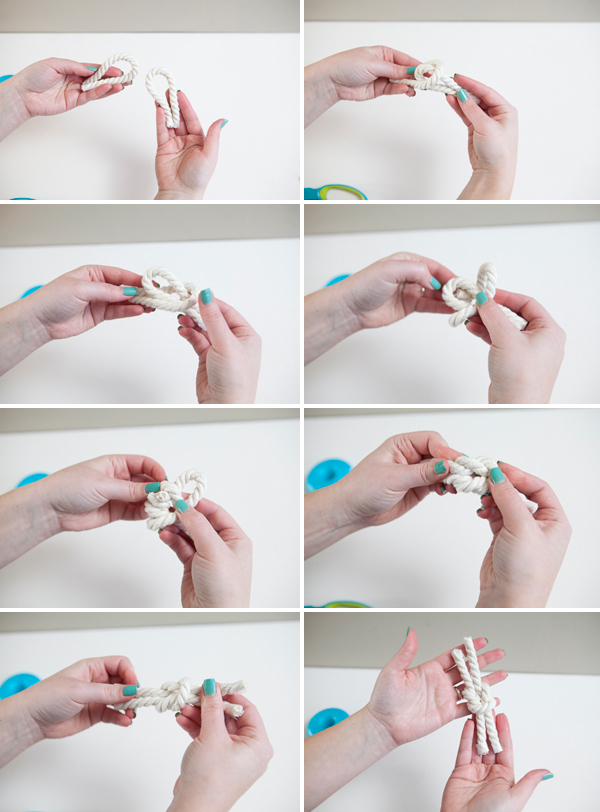
Now we are going to tie the square knot. To watch an animated clip of how to tie this not click {here}. Start by looping both pieces of your rope, insert the loop in your right hand into the loop in your left, then stick the ends of your left loop into the loop in your right hand, and pull the ends through – that’s it!
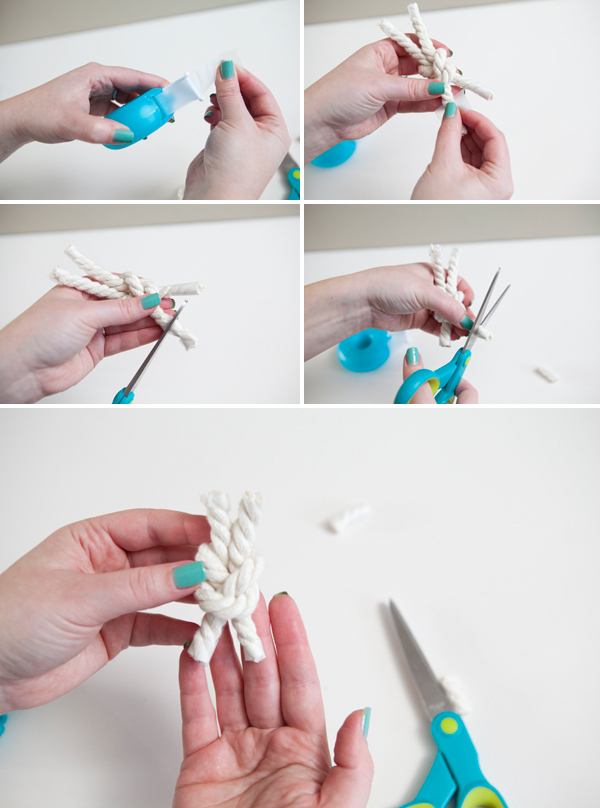
Because of the fraying issue, tape each end before you cut it – then cut across the tape, leaving about an inch of rope for each little end.
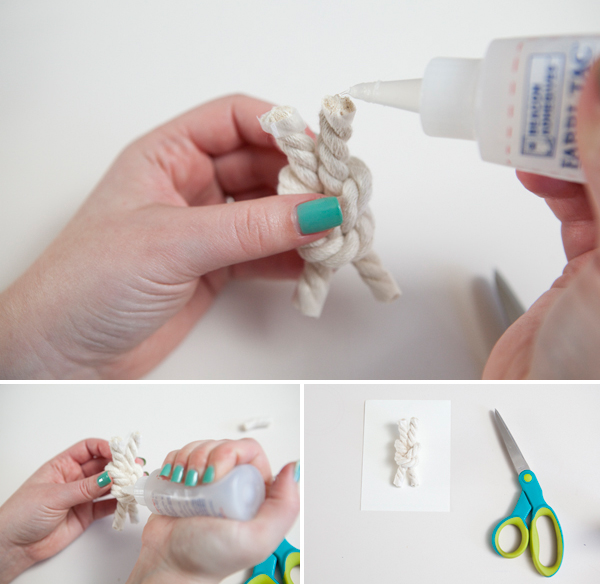
With the tape still on each end, dab a bit of Fabri-tac glue onto the tip of each rope end. Tap it with your finger to spread the glue around a little. Then add glue inside your knot to secure it.
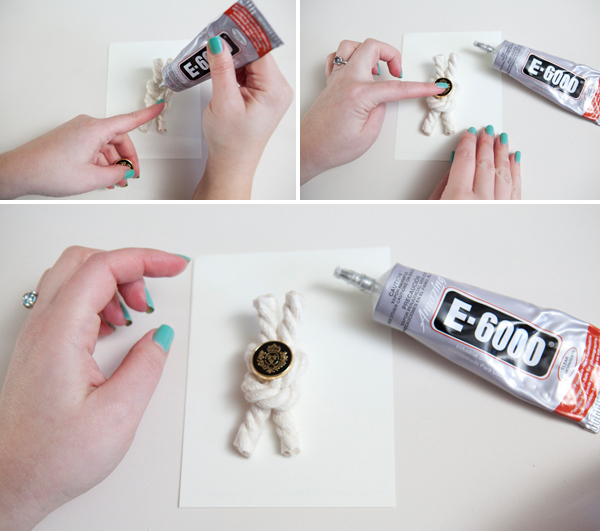
While your knot is drying you can apply your decorative button. Add a nice size squirt of E6000 glue to the middle of your knot and press your classy nautical button into the glue! Let dry completely, depending on your amount of glue this could be a few hours.
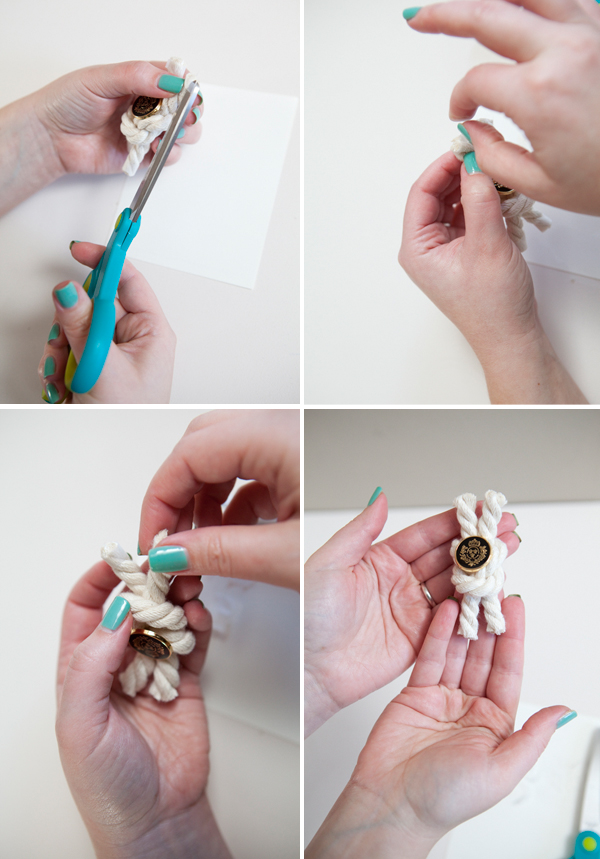
Next, remove the tape on the ends of your rope. You don’t want the rope to fray, so it is easiest to cut the tape a few times and gently pull all the little pieces off – instead of just pulling the whole strip of tape off. That’s it, your done!
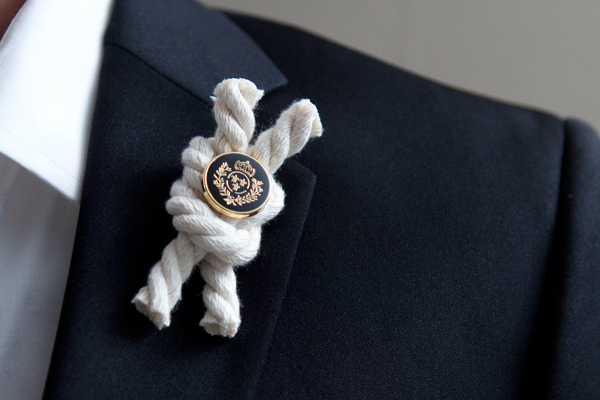
Handsome. Give your guys something strong and manly to wear like these adorable nautical bouts!
As with all our DIY tutorials, if you create one of our projects please send us a picture or a trackback – We Love Seeing Your Creativity! If you use Instagram or Twitter please use the hashtag #SomethingTurquoiseDIY. Happy Crafting!
Photography: Studio 11 // Diy: Jen | Something Turquoise // Rope, ribbon, buttons, Fabri-tac, E6000: JoAnn Fabric & Craft Store // nautical knot instructions: NetKnots.com // male model: handsome hubby! // nail polish: Essie, Turquoise & Caicos


Comments